
Super Shed 3000
Spoiler alert: The title may be just a bit of an embellishment. Just a bit.
Every so often, I put out the call for “who wants to teach me something new?” Recently, I had a taker who said that she would soon be building a shed and wondered if I would be interested in participating. I have no idea as to what response she expected, but I took her up on the offer! Whether or not I would be of much help would soon be determined, but I figured that we could have fun, I would try something different, and my friend and I would get a chance to get to know each other better. Samara and I have known each other for many years, but we never did anything together socially. One recent warm Saturday, this changed with the use of tools and an instruction manual! (We were building the storage shed from a kit.)

Samara told me that her boyfriend, Dave, would be helping, and I recruited my husband as well. I knew that he would actually be helpful with the project; I could only promise comic relief. When that Saturday for shed building arrived, we were very lucky with the weather! The weather report all week had suggested storms. It turned out to be a perfect day! I have since started checking weekly weather forecasts as a “curiosity” to see how it compares to the actual weather. For practicality, I now mainly check weather reports the “day of” to have a “guesstimate” of the actual weather for the day. I digress.
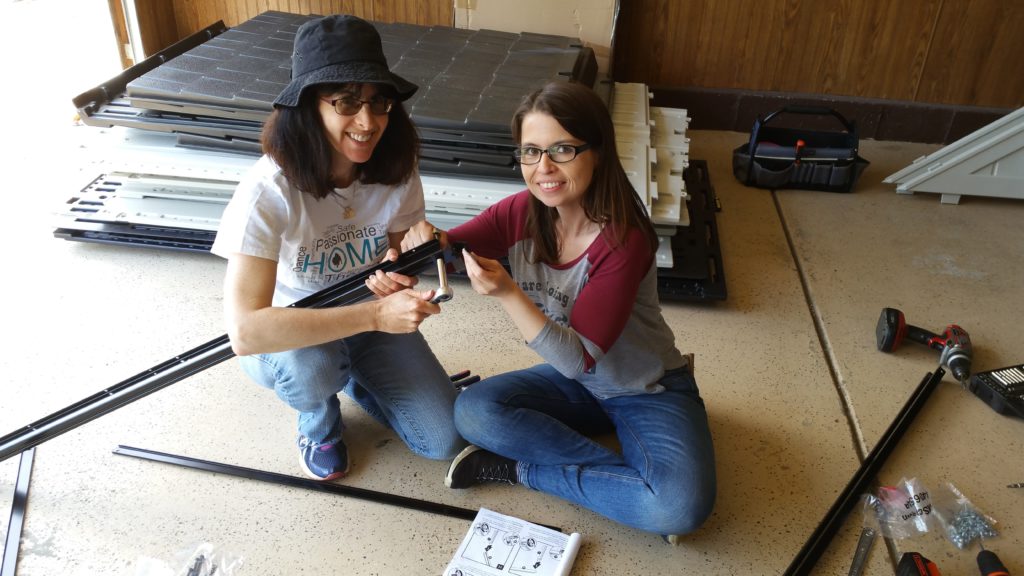
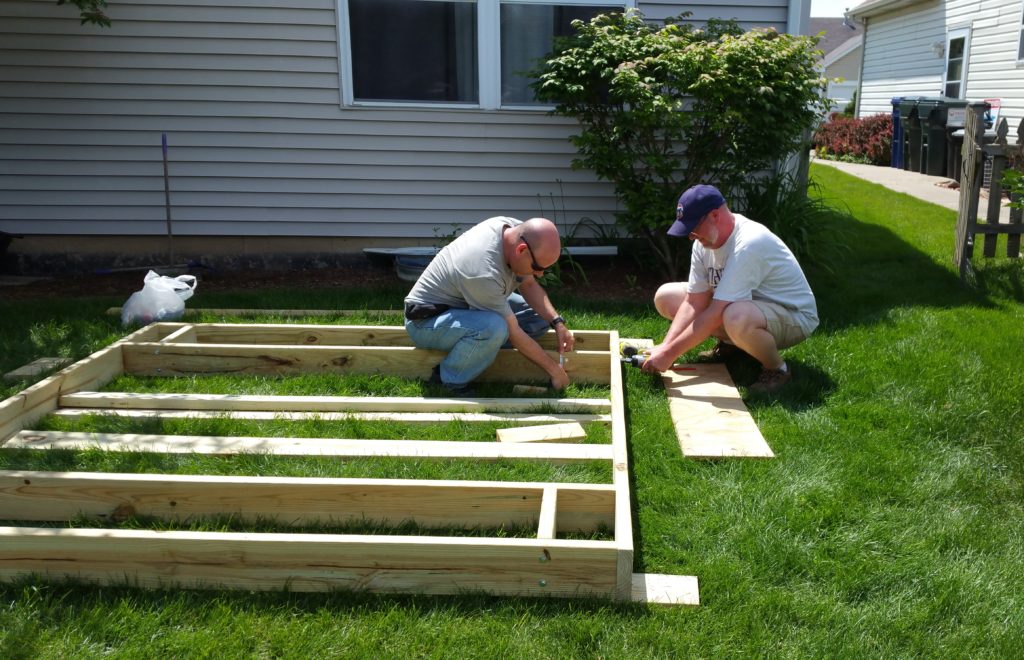
My husband and I arrived at Samara’s house, tools in the trunk (my husband loves his tools!), ready for action! The guys were in charge of building a foundation for the shed. Samara and I would do something men would have a much harder time doing–following an instruction manual. ; ) Truthfully, we wouldn’t know how to build the foundation, so we focused on what we figured we could do. I acknowledge that I am not (yet) very handy, but I do believe that I can follow the proverbial bouncing ball with a set of instructions. The men went into the back with their wood planks and power tools while Samara and I planted ourselves in the garage with our set of tools and got ourselves started. Our focus was to get going with the actual shed parts. The preliminary steps included putting together the doors and trusses for the roof. (For those who don’t know, trusses are the structural beams that support the roof.) We started with the instruction manual and the shed pieces around us. We hit our first snag when, for building the doors, we had to find the “K” bag of screws and bolts. The multiple bags of various little pieces were labelled with six digit numbers. Note the challenge? We took a step back, determined to figure this out. We found the page in the manual with the different types of small parts listed. That page had the parts printed with six digits numbers plus letters–except for K. Using some good old fashioned process of elimination and a Sharpie to mark the bags, we played the matching game with the numbered bags, the pictures in the instruction manual, and we figured that the two bags left over at the end (with different numbers mind you) were “K”. The contents (fortunately) were the same and were consistent with what was needed for the construction. Now we were ready to use tools! (I really was feeling quite powerful at this time!) Together, we put together the doors and their windows successfully! We also did a lot of talking and getting to know each other better. We learned that the guys were bonding over common interests in the backyard while working on their part of the project. (I always like when my husband can make new friends, too. : ) )
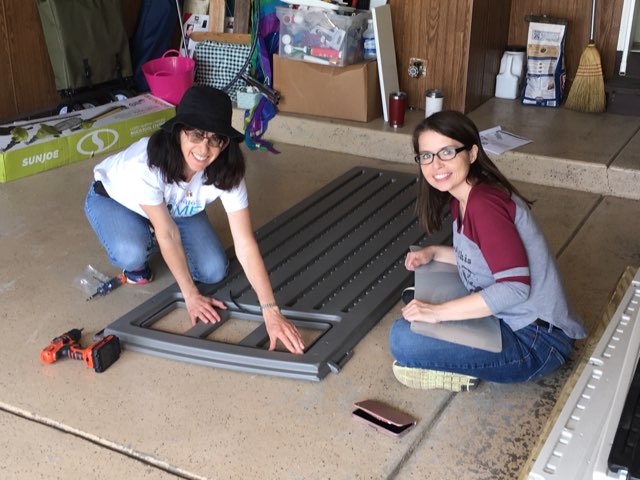
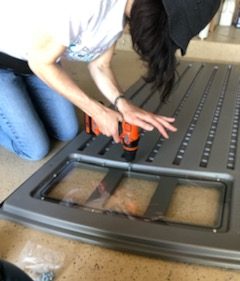
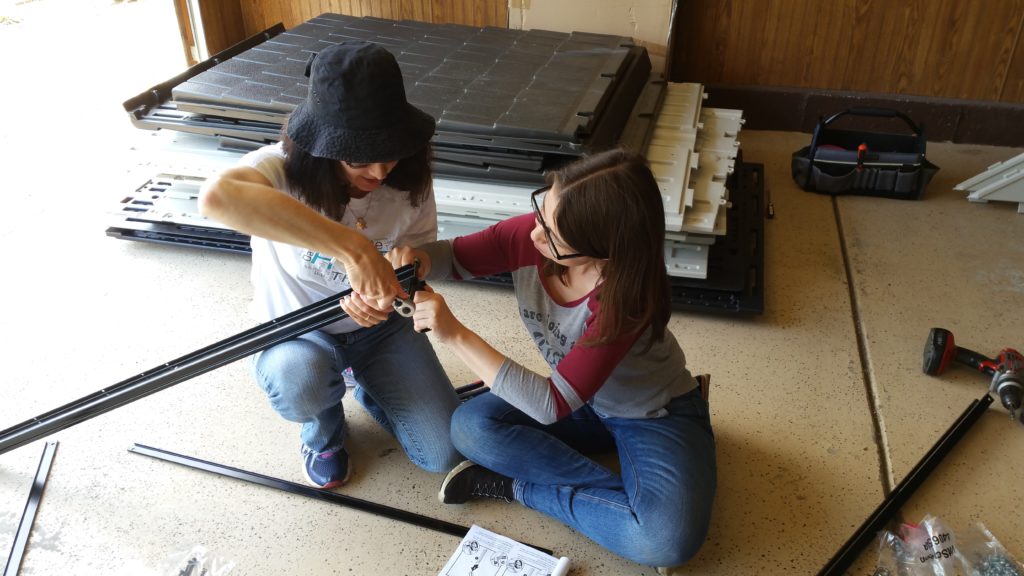
After a lunch break, it was time to work on trusses. Although Samara and I are strong independent women, we did occasionally have to recruit the menfolk for some guidance (better to ask for help than worry about a shed collapsing). Amongst the pieces needed for putting the trusses together were lock nuts. When we tried to tighten them in place, they did not go very far and were not holding the pieces of metal together well. The guys came to our aid. Now we understand why we had trouble. The kit included what I now know are nylon insert lock nuts.
Our fingers would not be sufficient to spin these into the correct position. We used socket wrenches to ratchet them (successfully) into position. (In case you are like me and don’t know a whole lot about different types of wrenches, here is a mini-primer.)
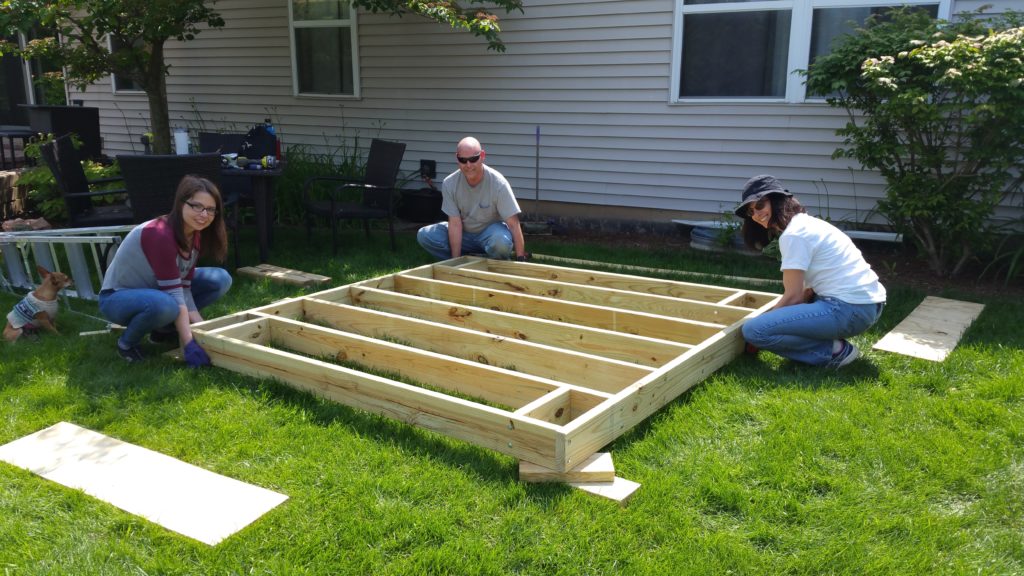
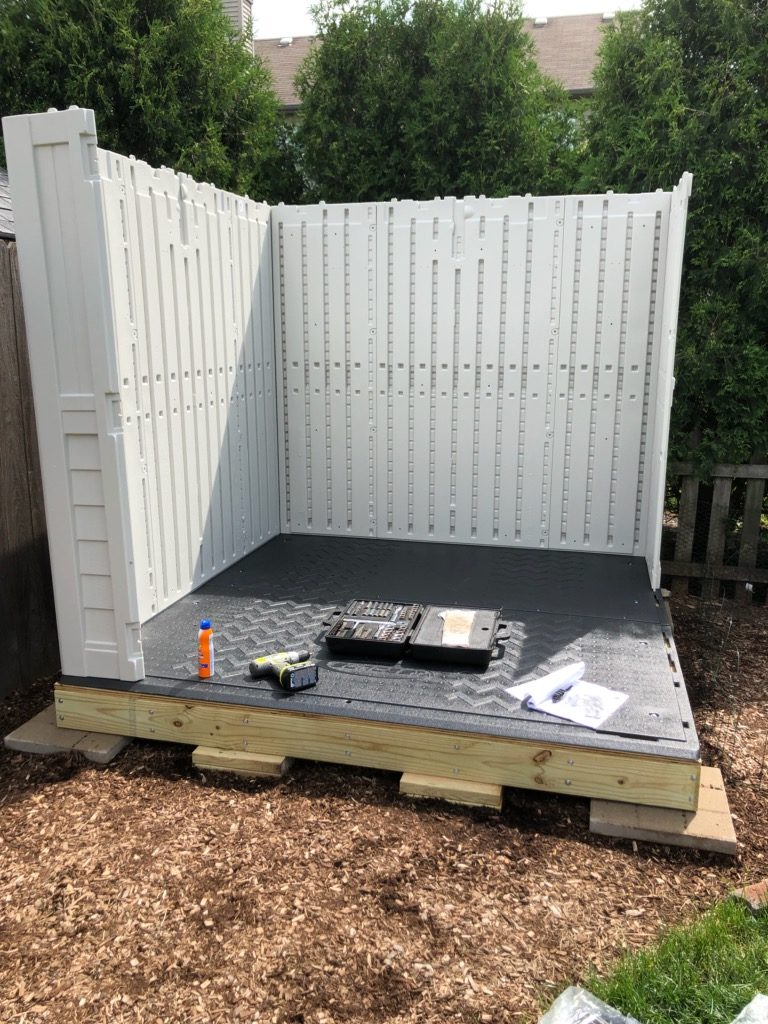
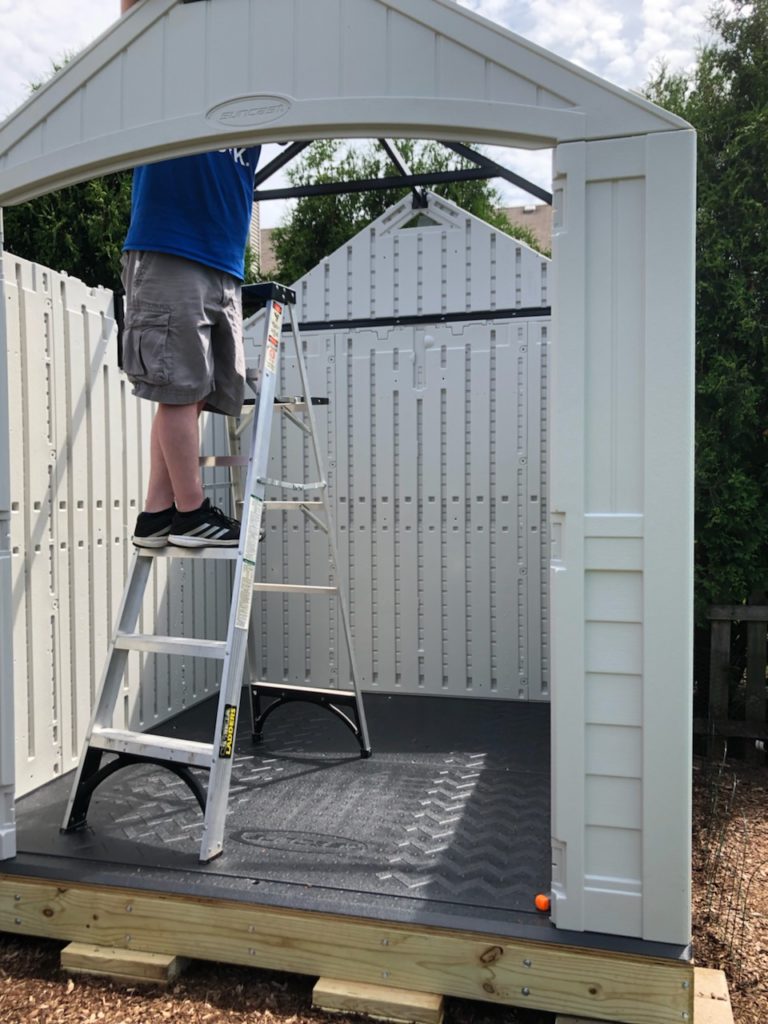
Our truss building did not go as smoothly as our door building, but we were successful in the end! Once we learned how to properly put into place the nylon lock nuts, we made a few errors (which we were able to identify and correct) involving wrong sides and wrong directions. When we realized that something wasn’t working quite right, I am happy to say that we worked through the problem and, with lots of laughs when we could identify some of our blunders, fixed them. We were finally ready to bring everything to the backyard so that the shed could be assembled. The area where the shed would be situated was prepped, and the platform put into place and leveled. By the time that my husband and I had to leave for the day (house league baseball game on the agenda), the shed itself had not actually been put together, but everything was in place, and Samara and Dave would be able to easily erect it the next morning, which they did.
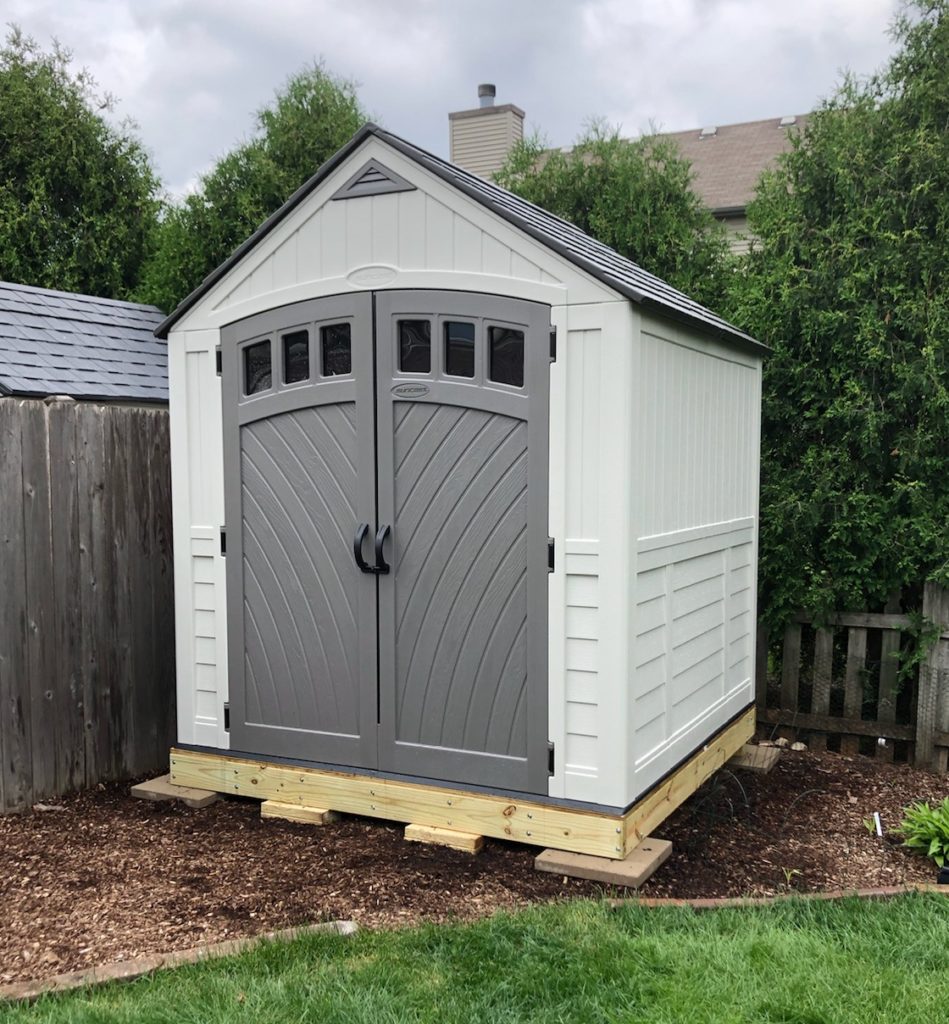
I am so glad that Steve and I spent part of that Saturday helping Samara and Dave with the shed! A task that could otherwise have been extremely boring and frustrating became a fun activity, and we all had the chance to socialize and get to know each other better.

Update: I have been informed that the shed is already being put to good use and contains (gasp!) a snow blower (something I do not want to think about at this particular time since summer just arrived)!


You May Also Like
Lunch at Enzo and Lucia–My Mouth is Watering Just Thinking About It
A-hem