Tinted Glass with Flowers, a Pinterest Success (mostly)!
I was interested in making a little “something” for Mother’s Day (for my mom, sister, and aunt), and I have a “too large” collection of empty glass bottles saved over the years, so I decided to try something I had seen on Pinterest in the past that did not look too complex and involved items I already had at home. I wanted to try to tint some glass bottles. I used several empty Starbucks frappuccino bottles, Mod Podge Gloss Luster Finish, and food coloring.
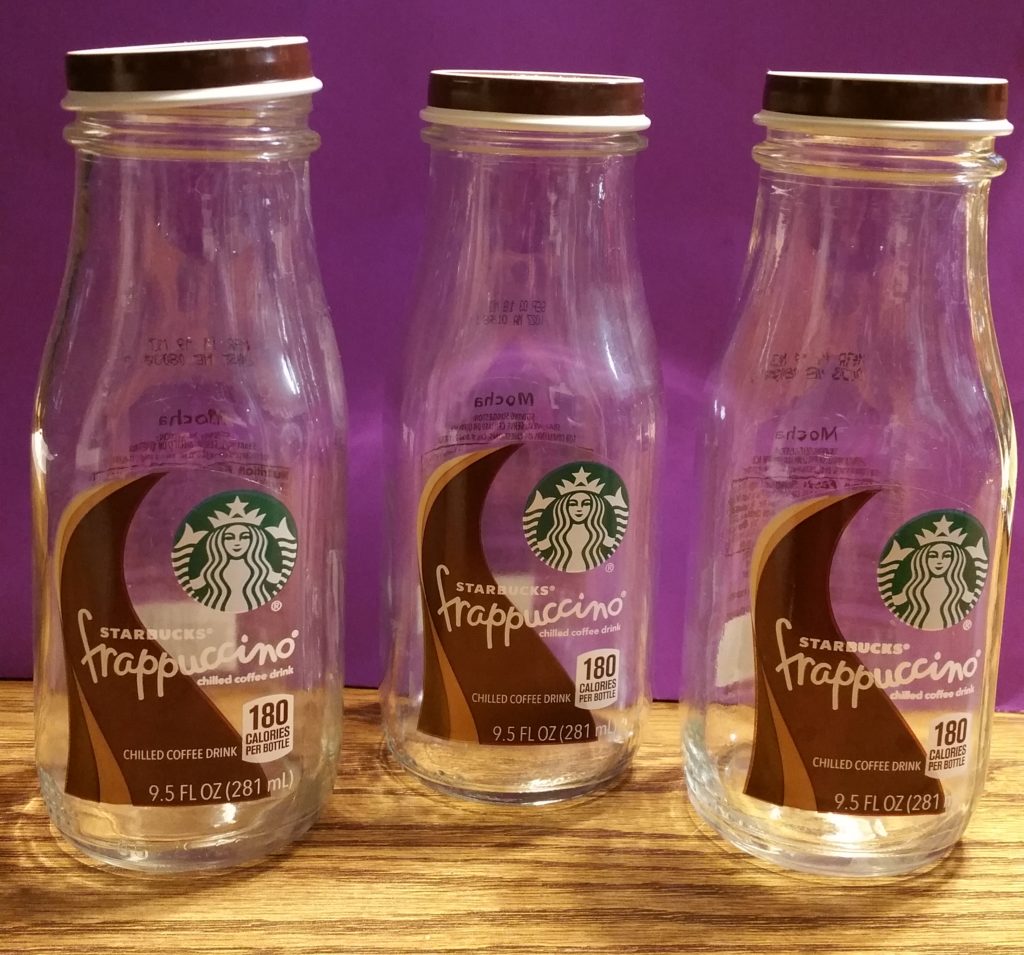
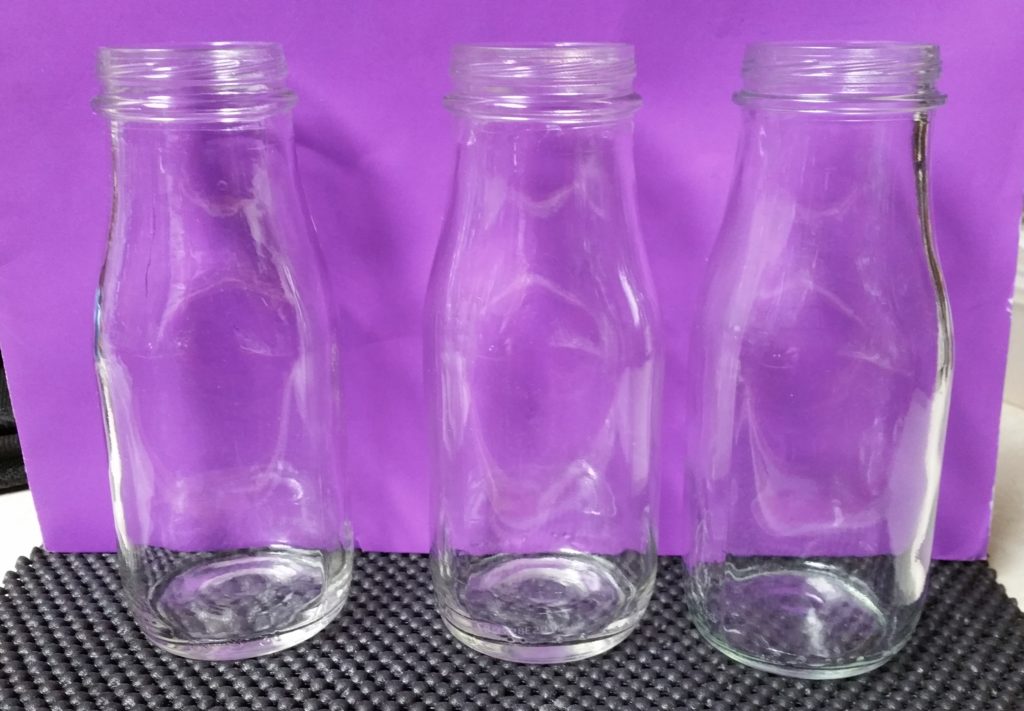
After removing the stickers from the Starbucks bottles, I used Goo Gone to remove the adhesive and nail polish remover to remove the purple stamped-on date. The bottles were then washed with soap and water. This process was easy. Most of the project went smoothly, but there were some hiccups along the way. I will admit that I did not follow the instructions to the letter but followed the general idea.
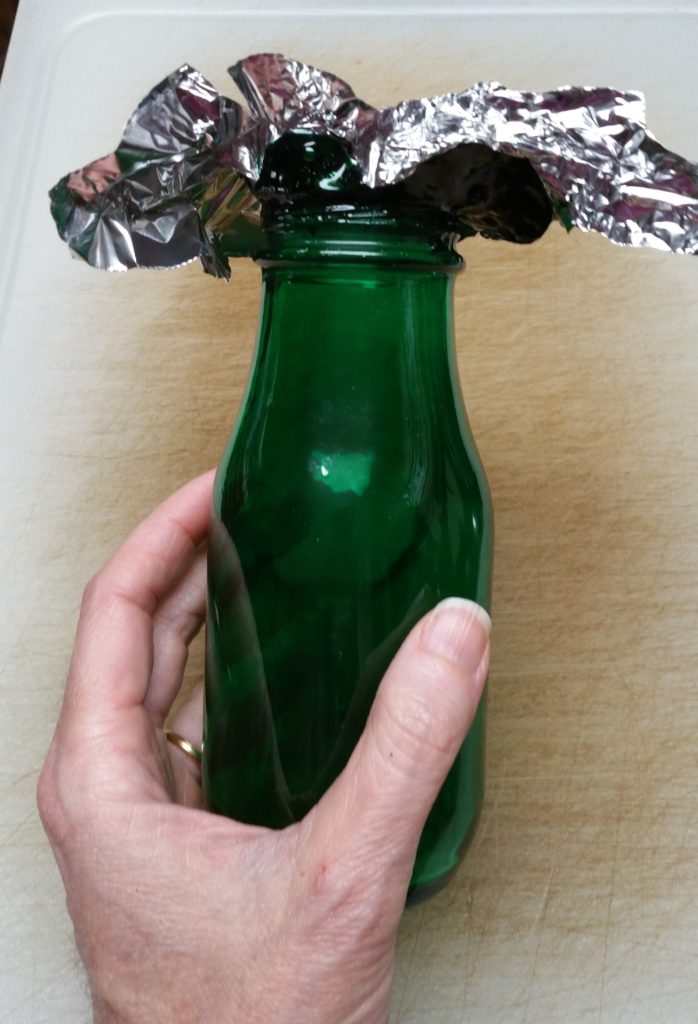
I squeezed some of the Mod Podge (I had a bunch of small bottles I purchased on clearance a few years ago after some holiday) into a little container and added a combination of blue and green food coloring. I did not really measure anything out, and I kept not having quite enough to fully coat the bottles, so I just kept mixing up more. I figured that even if the color wasn’t completely consistent, it would be fine once added to the bottle and allowed to coat and drip. By the third glass bottle, I ran out of the green food coloring but just used blue and yellow (good old fashioned color mixing). After doing a fair job of coating the bottles, I let them stand upside down on some wax paper and then a paper towel. I probably did not let them sit for an hour as mentioned in the instructions I was sort-of following. I was scared that so much would drip out that there would not be much coating left. Whether or not it made a real difference, I’m not sure.


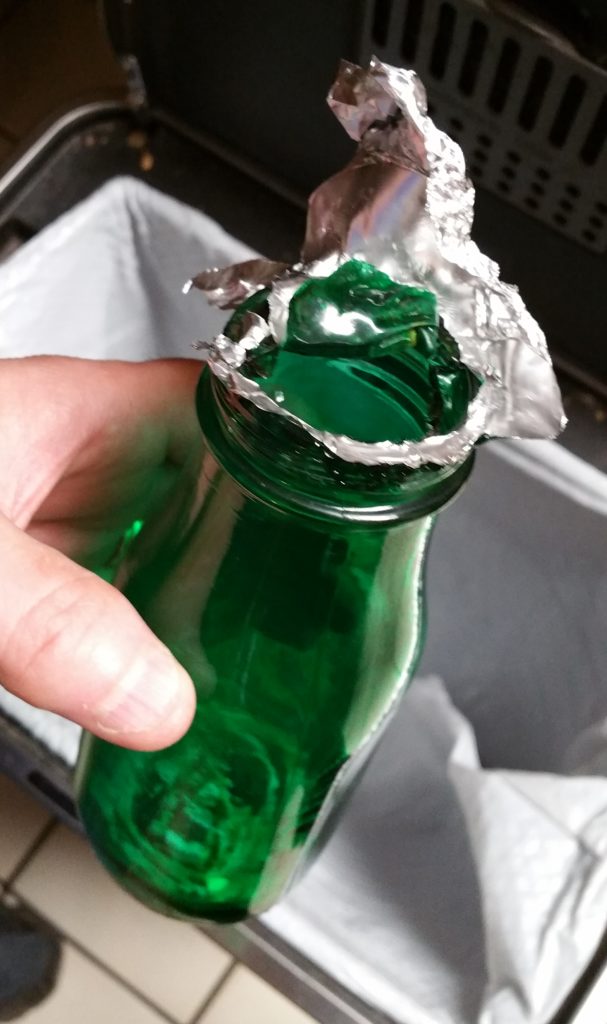
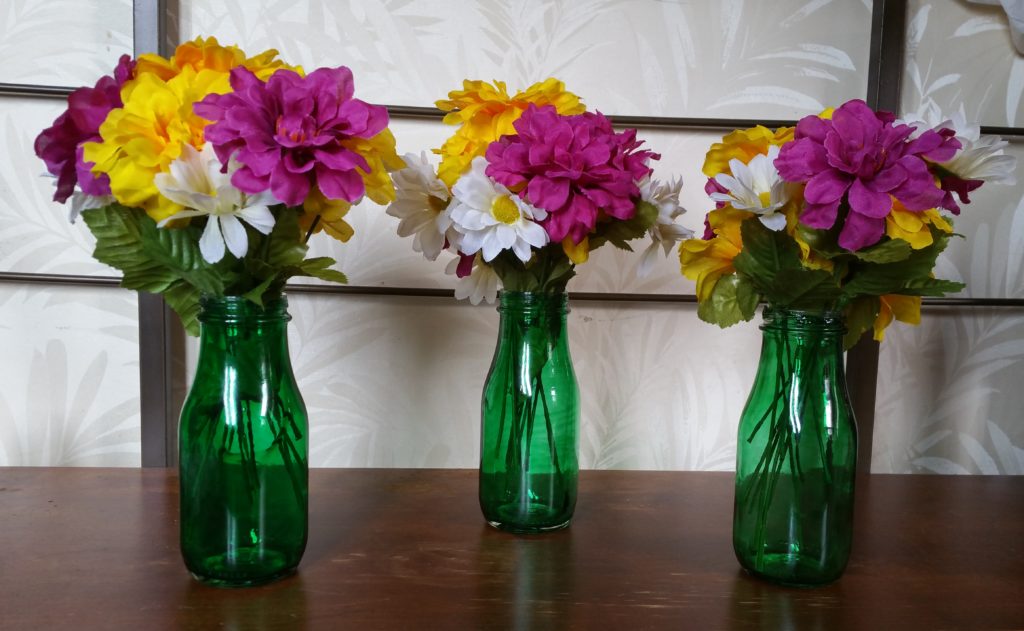
These were then set upside down on wax paper (on a cookie sheet) in a preheated oven. Out of paranoia, after 10 minutes, I took them out and changed the wax paper to aluminum foil. I feared that the wax paper would start to melt. I know that it can at high temperatures. I did not want to take the time at that moment to find out if it would really be an issue at a low temp–I worried that I would figure out it was problematic after it was too late to do anything about it. So, I reorganized a bit and put them back into the oven. There was still a lot of dripping colored glue. After approximately 45 minutes, the glass bottles were a clear green. It was cool to see how they went from opaque to clear! The color was much more green than I had anticipated, but, oh well. They spent some time cooling in the oven and finished cooling on the stovetop (because I just wanted to take them out). At this point, they looked great!


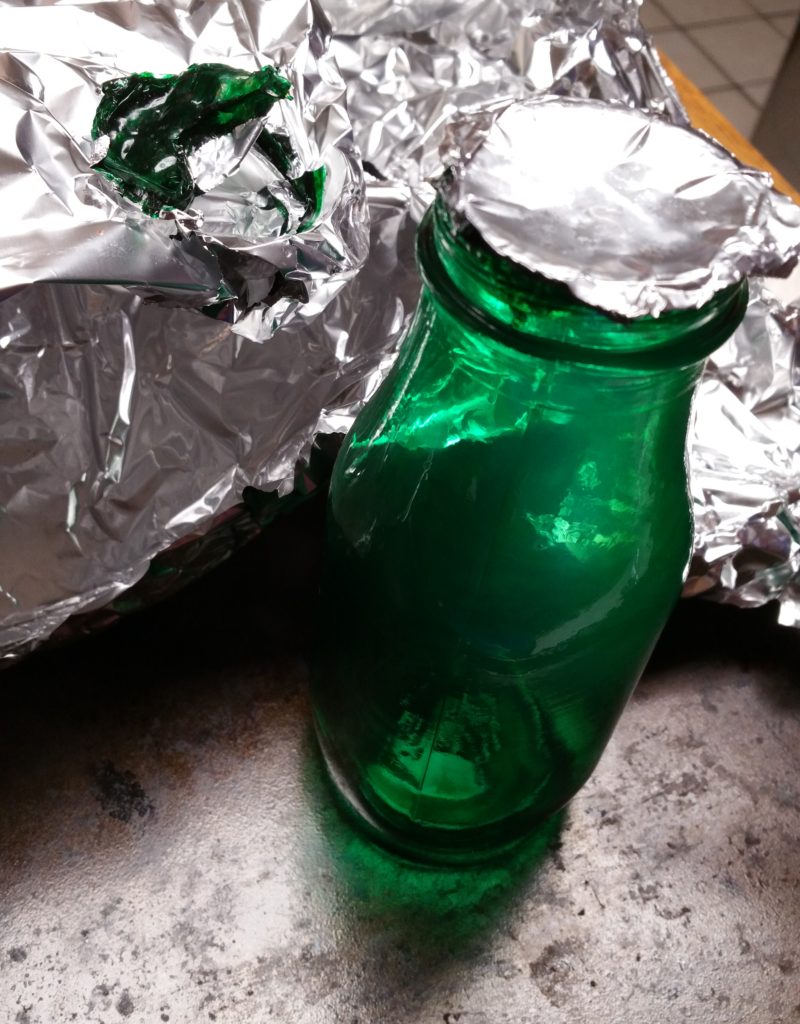
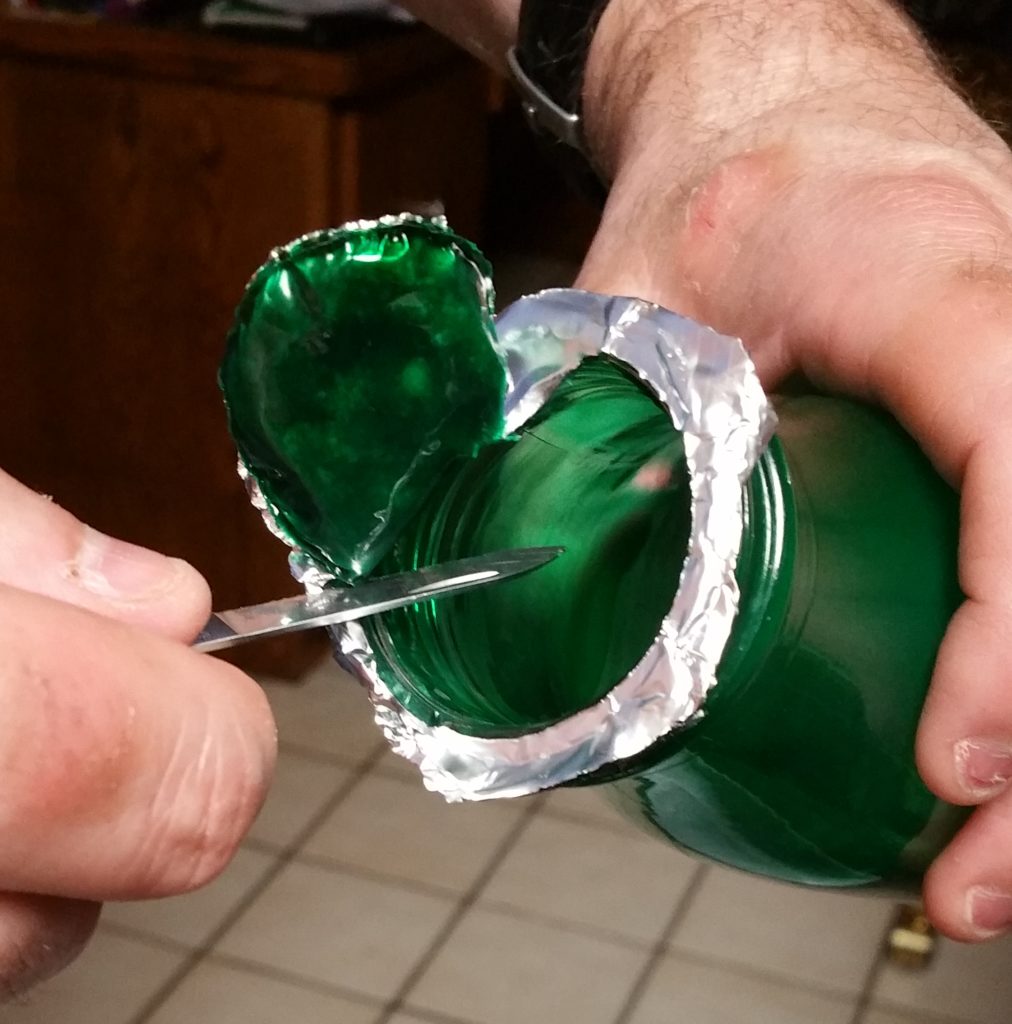
Do you remember how I mentioned that a lot of glue continued to drip? It also stuck to the foil. I don’t know if the same thing would have happened on wax paper, and I may never know the truth about that. I had to try to tear and cut the foil off the top. It is important to realize the the color of the glass is not due to any sort of glass infusion. There is simply a coat of colored glue on the inside of the bottle. That coat could also be peeled off. I was reminded of this as I tried to remove the foil. Eventually, with some teamwork with my husband, we found a way to remove most of the foil without messing up the color on the bottle too much. The slight mess at the openings of the bottles is what separated a complete Pinterest success with a “pretty close and my family will still love me anyway” success.
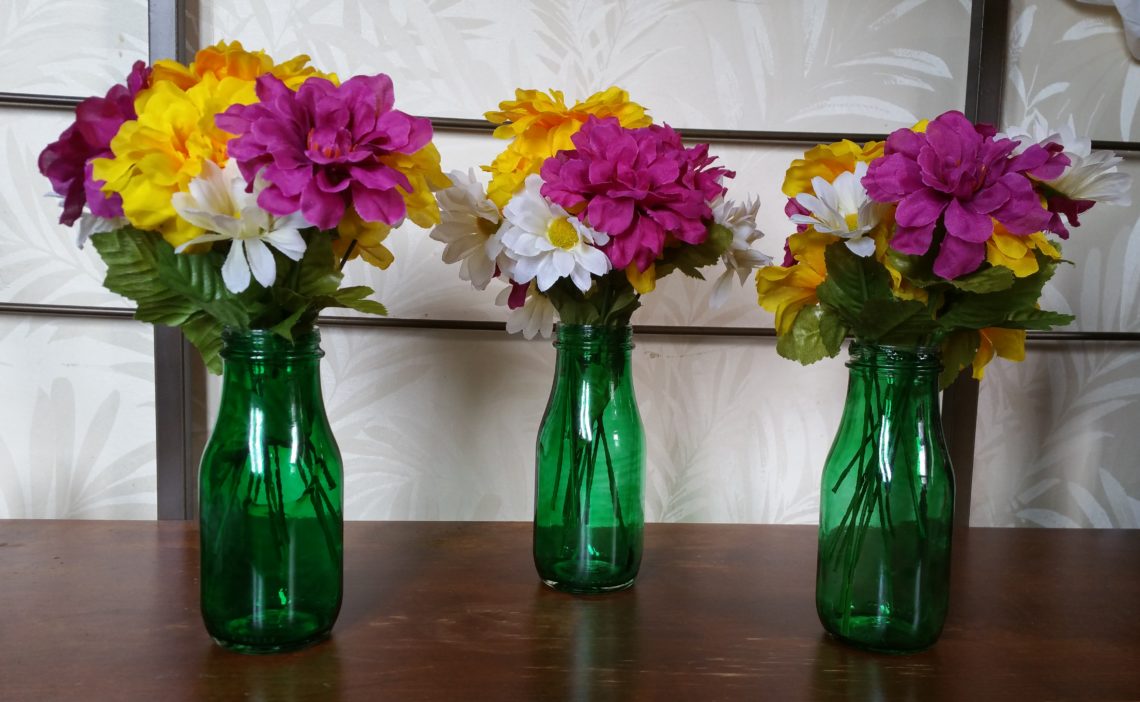
Fortunately, hiding the “trouble areas” turned out to be a viable option. I wasn’t going to give empty colored bottles, and I don’t think that I can put water into the bottles due to the glue coating, so I picked up some artificial flowers. I ran over to Walmart and picked up 10 bunches for less than a dollar each. As they were, they were too long for the bottles, so I wanted to cut them into individual stems. My husband was given the chance to use one of his power tools (he loves doing that) and cut them for me. I am not sure what would have been the easiest way to do it without the use of power tools since the stems were wire. Wire cutters would probably be better than regular scissors.
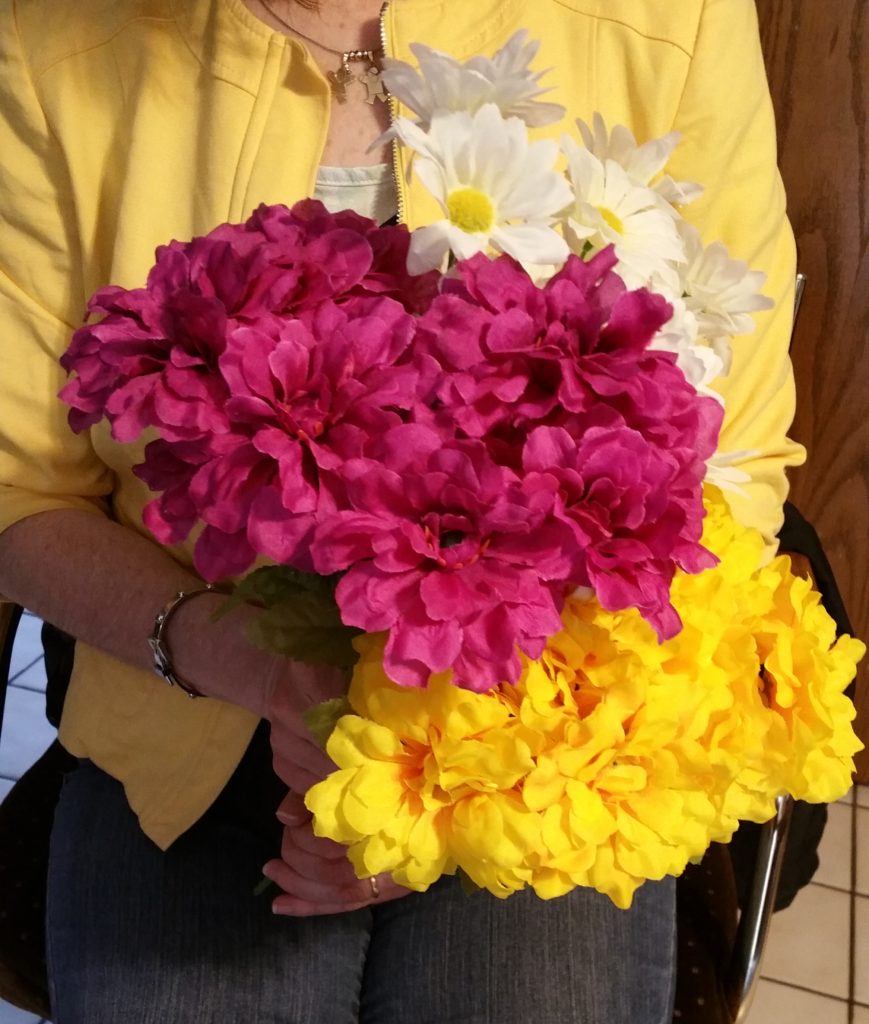
I admit that the final product looked better than I had expected (and I still had leftover stems–these will eventually be used in one of my MANY remaining empty Starbucks bottles I have stored in my basement)!

This was definitely a project that I will do again! I may try letting them drip longer before putting them in the oven, and I may try using parchment paper next time rather than foil. If I remember, I may also see what other information I can find about wax paper use in ovens. If you have any thoughts or comments, please share them!
Happy Mother’s Day!


You May Also Like

Glass Etching–Final Product Looked Great Despite Being a First Attempt!
Mosaic Birdhouse
