Glass Etching–Final Product Looked Great Despite Being a First Attempt!
Thank you to my friend, Sue, who introduced me to the world of glass etching! I have known Sue for a few years via my local Community Arts Center. She has been part of the staff of several community theater productions in which my daughter has performed. (I gladly embraced the role of “stage mom”–a supportive one; not a pushy one.) Sue responded to my original request on Facebook in which I asked members of my community to teach me something new, and she gets the honor of being the first to join me for a one-on-one session! (Congrats, Sue! : ) )
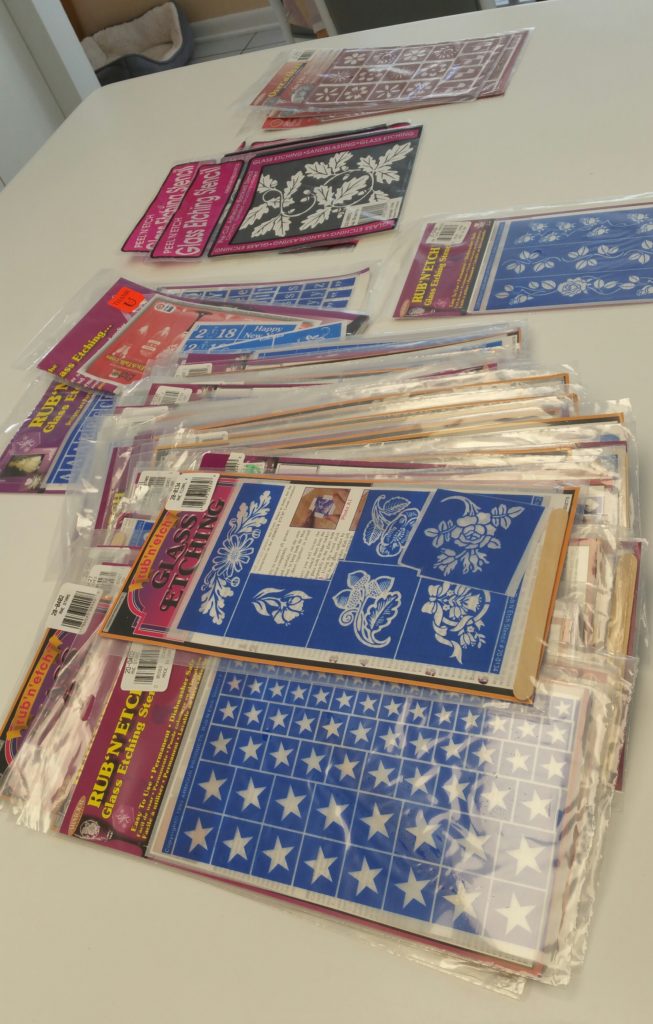
I arrived at her home, and she and I worked on glass etching projects together, step by step. It was really quite simple and straightforward, and I loved the results! Sue had a multitude of etching stencils from which I could choose. Most of the options were “Rub ‘N’ Etch Glass Etching Stencils,” and I chose from this assortment. These are one time use stencils. She had some reusable ones which I did not test out this time.
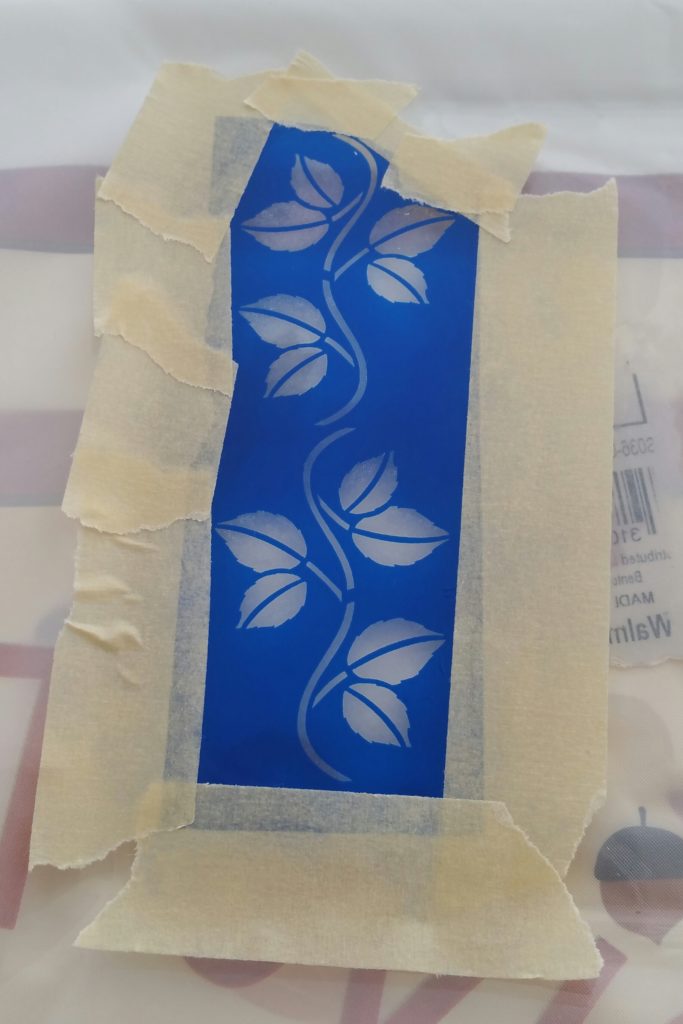
After cleaning our glass, we cut the stencil sheet (and the frosted backing sheet )for the designs we had chosen The stencil part was placed against the glass and then secured down with masking tape. When you look at the stencil, you see a shape cut out of blue material, and the stencil is covered by a clear plastic sheet.
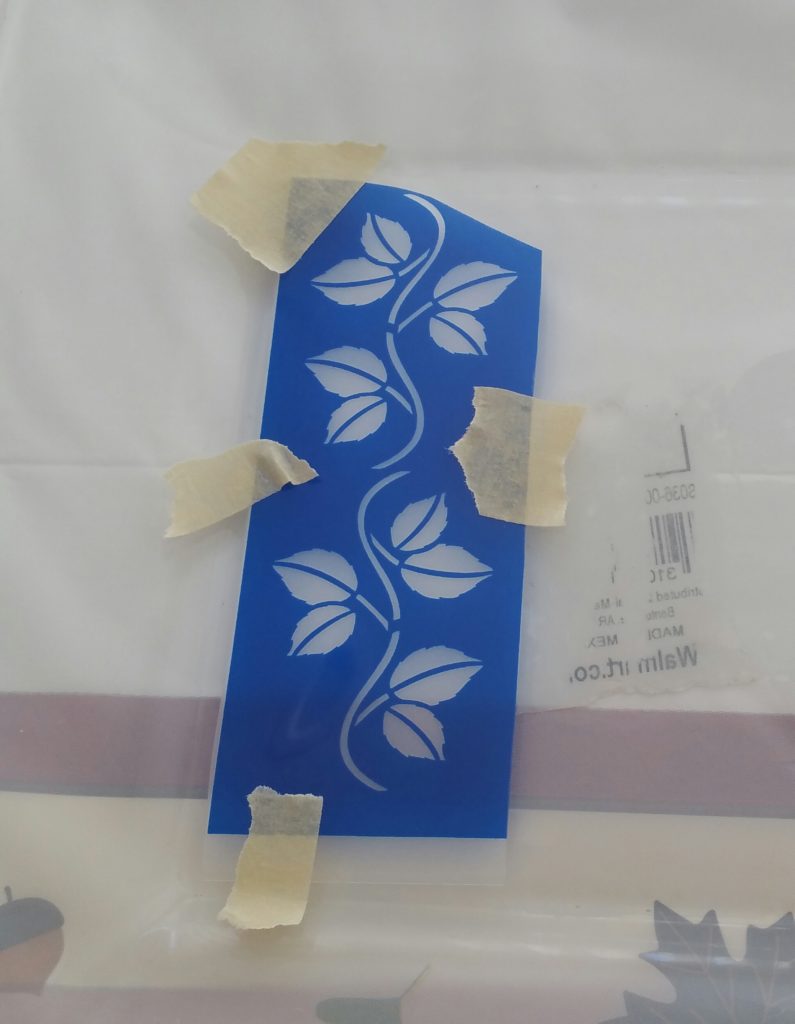
The next step was the hard part (physically, not intellectually)–the stencil was rubbed using a wooden stick so that the blue portion of the stencil was transferred onto the glass. The blue material serves to protect the glass that is to remain intact. The concept of rubbing the stencil onto the glass was simple. The execution was not. As I was rubbing, I learned that my hand is not quite as strong as I thought, and I was glad that I had not chosen a larger stencil!

Once the stencil was adhered to the glass, the masking tape and protective clear sheet were removed. Next, a border of masking tape was applied around the entire border of the stencil. This was to provide a wider margin of protection. Then, while wearing protective gloves and an apron, the etching material was globbed onto the stencil. As mentioned, the blue material as well as the additional tape border served to protect the glass that was to remain in its “unetched” state.
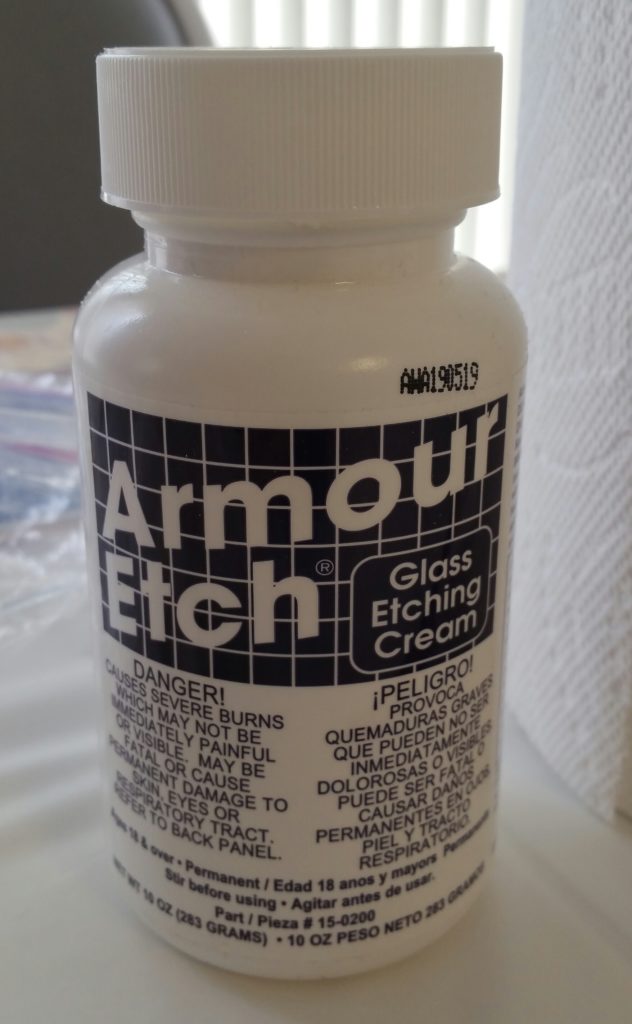
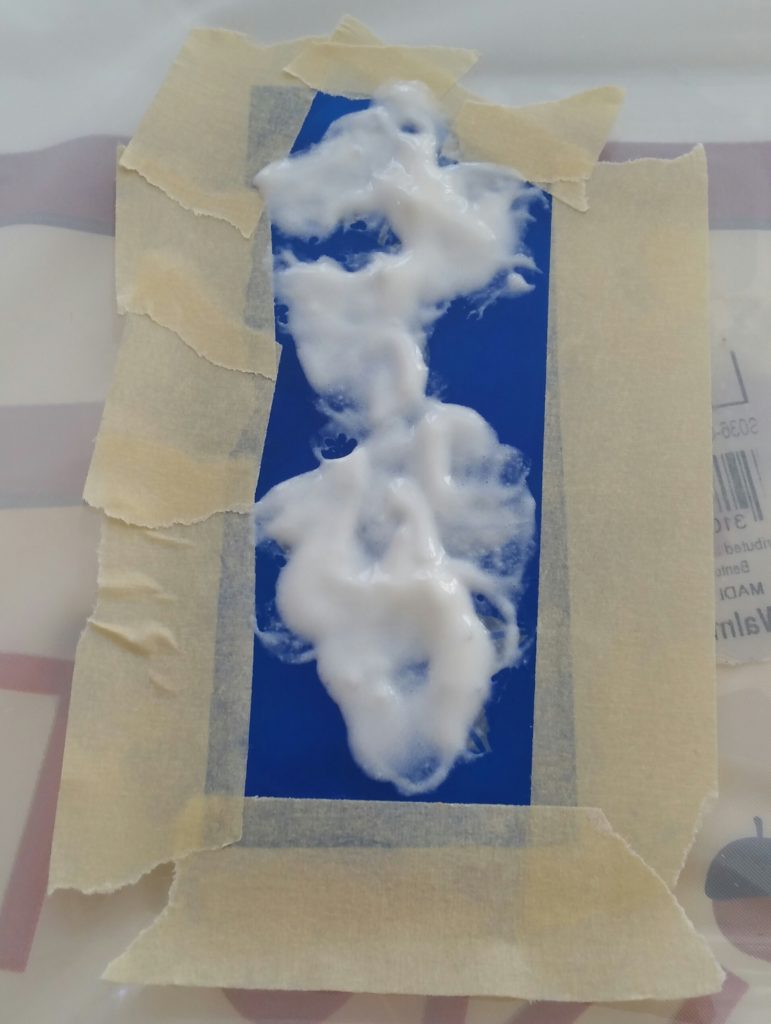
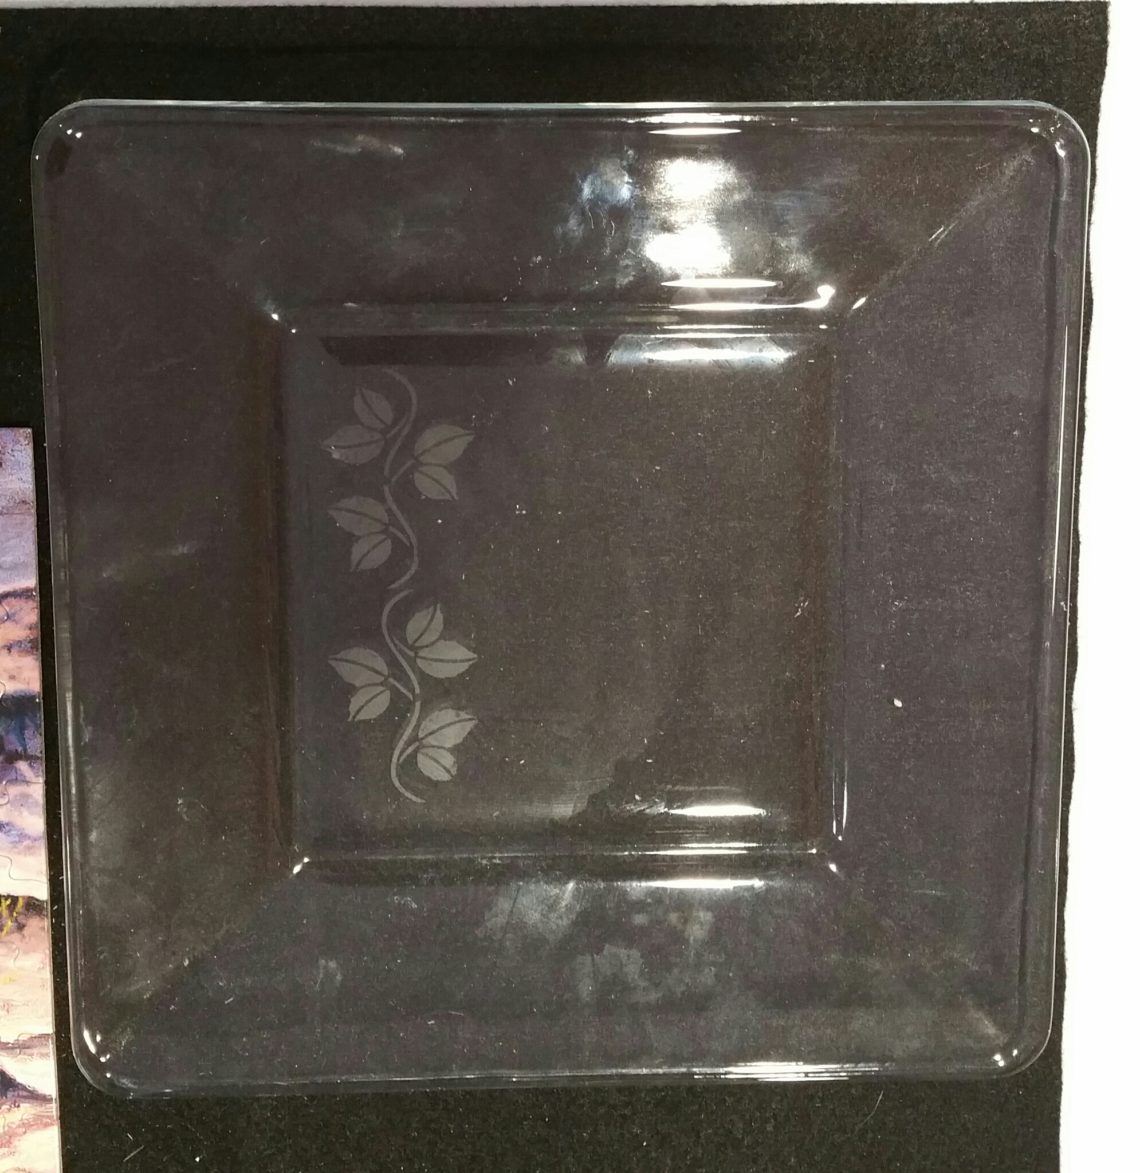
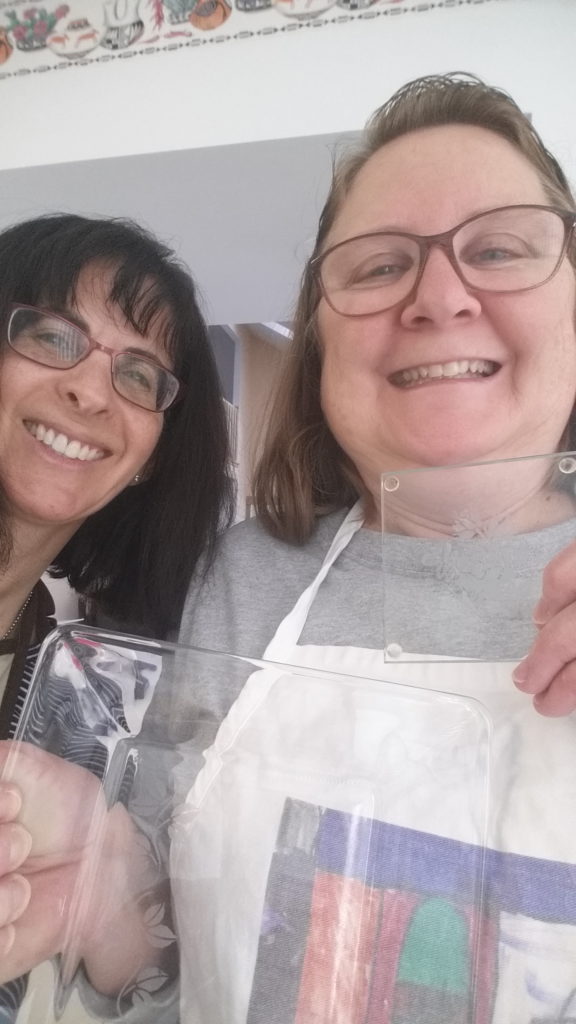
After only a few minutes, the etching cream was rinsed off, and the tape and residual blue protective material were removed and rubbed off. (The instructions said “1 minute,” but by the time we finished discussing the process, a bit more time had passed. No harm done!) The last step was ooh-ing and aah-ing at the final product! The final result was very impressive in my opinion!


Sue gifted me with a glass etching kit so that I can continue to practice my new found skill at home on some more items. I am looking forward to it, and I hope to be able to “etch it forward” with my kids and husband (Yea!–a new non-screen based indoor activity we can enjoy when the weather is nasty!) (Gee, I wonder what types of gifts people may be receiving over the next few months. Hmmm.)

Added bonus: Sue and I had known each other previously in the context of community theater as well as whatever other bits we could glean from being Facebook friends. I truly felt as though we had the chance to know each other so much better after spending our time together. When I started my “living and learning” project, I had two main goals–try something new and build new relationships. Check and check!


2 Comments
waterfallmagazine
https://waterfallmagazine.com
Hi, I log on to your blog on a regular basis.
Your story-telling style is witty, keep it up!
Beckie
Thank you! I am glad that you enjoy it!