
Homemade Pizza Night!
(Personal disclaimer: Currently, my family is celebrating the holiday of Passover. This pizza was prepared and enjoyed before the holiday. During Passover, you cannot eat leavened products.)
If you have been to a grocery store recently, you may have noticed the lack of cheese pizza availability. Of course, this does absolutely nothing to diminish the craving for pizza. Other items people have had trouble finding recently, from what I have heard at least, include items for baking such as flour and yeast. Well, as members of warehouse clubs, despite not being able to find these items at our neighborhood grocery stores, my husband DID find them at a big box store. One day, he came home with a TWENTY-FIVE POUND bag of flour and I believe a lifetime supply of yeast (to be measured out by the teaspoon, not individual packets).
I guess that I will be doing A LOT more baking for a while. Ironically, he purchased these less than a week before the start of Passover (thus, we cannot use the yeast during that holiday). We will try to make matzo. I digress.
I decided that I would make pizza dough. It was not hard to find jarred sauce and shredded cheese. (We were picking our battles in terms of homemade vs prepared items. ) I have the cookbook, How to Bake by Nick Malgieri. I have had this 400+ page cookbook for YEARS! Until this week, I had only made one recipe from this book. Just one–on page 10 is my go-to recipe for low-fat banana bread. There is nothing wrong with the rest of the book. I just never really looked and followed through on anything else in it…until now! Most of my other baking has used recipes found on-line or saved and printed out years ago. I decided to double the number of recipes followed in this book, and I found a recipe for home-style pizza. (Full disclosure–I did not follow the whole recipe, just the part for the pizza dough. I am still counting it as my SECOND recipe followed from the book.)
The following is taken verbatim from How to Bake by Nick Malgieri (with a few added comments of mine)–These are the instructions for the dough:
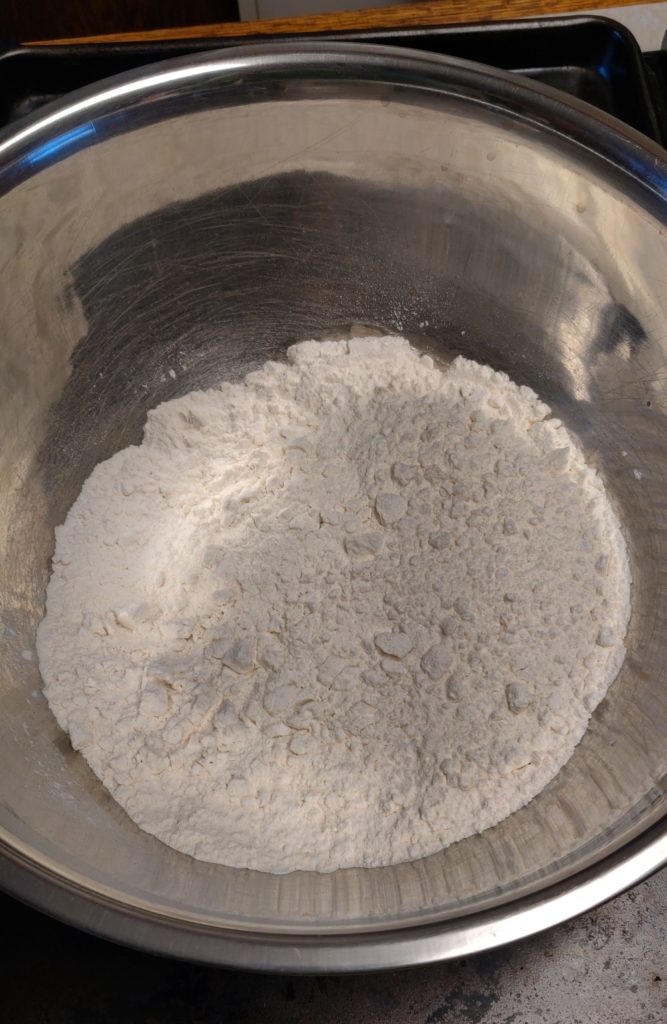
2 ½ cups unbleached all-purpose flour
1 teaspoon salt
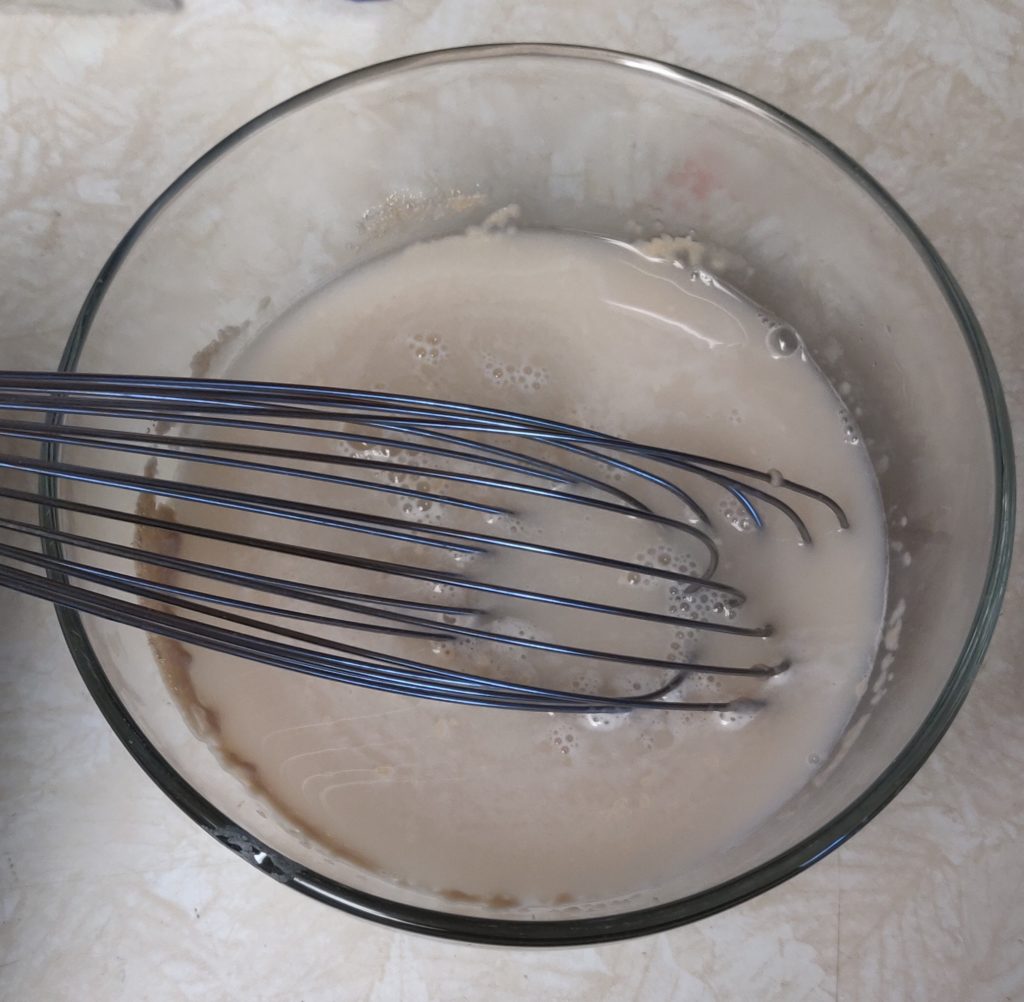
1 cup warm tap water (about 110 degrees) {I just heated up some water in the microwave for about 45 seconds. I have no clue what the actual temperature of the water I used was when I made the dough.}
2 ½ teaspoons (1 envelope) active dry yeast
3 tablespoons olive oil
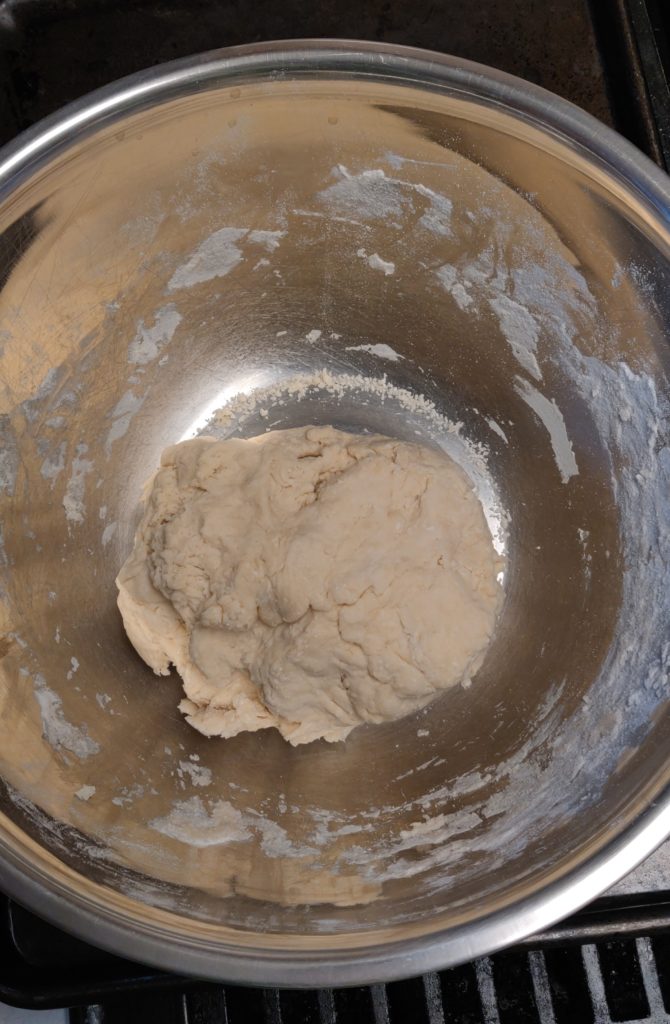
For the dough, stir the flour and salt in a 2-quart mixing bowl to combine; make a well in the center. Measure the water and pour it into a small bowl; whisk in the yeast, then 2 tablespoons of the olive oil. Pour the liquid mixture into the well in the flour and stir with a rubber spatula until a soft, sticky dough forms. Beat the dough for a minute, until it looks smoother. (I was honestly too lazy to take out the mixer, so I just kneaded the dough by hand and hoped for the best. It worked!) Cover the bowl tightly with plastic wrap and allow the dough to rise until it is doubled in bulk, about one hour.


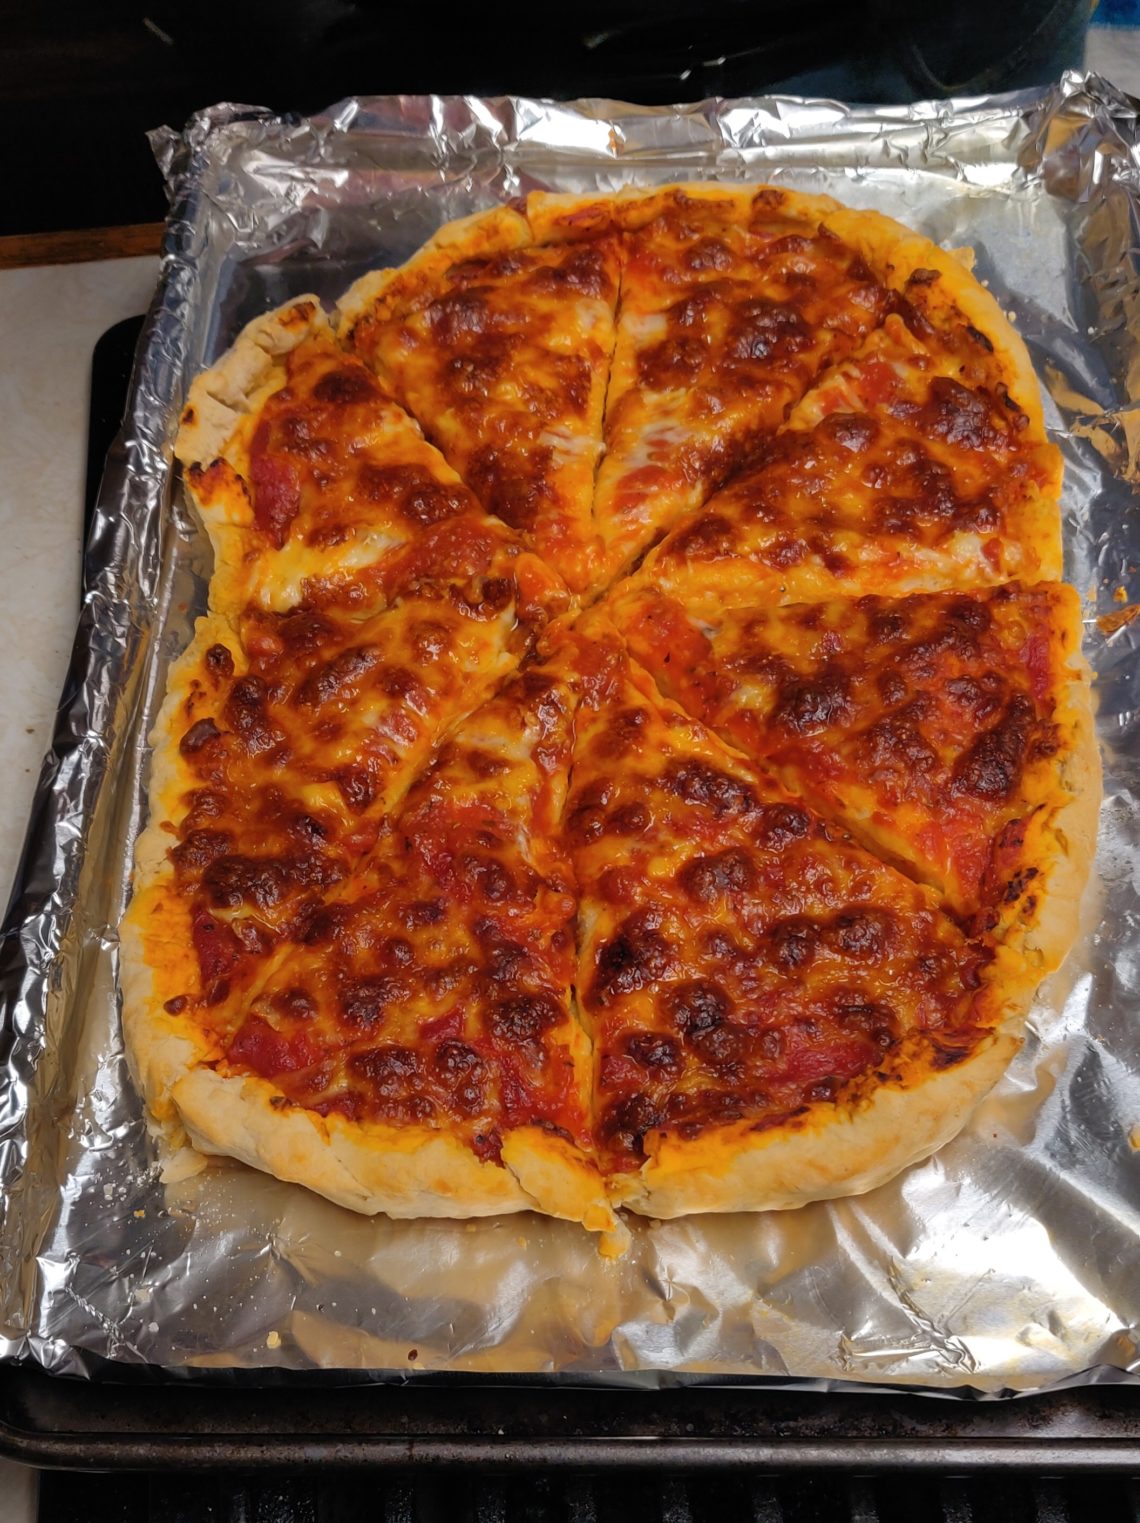
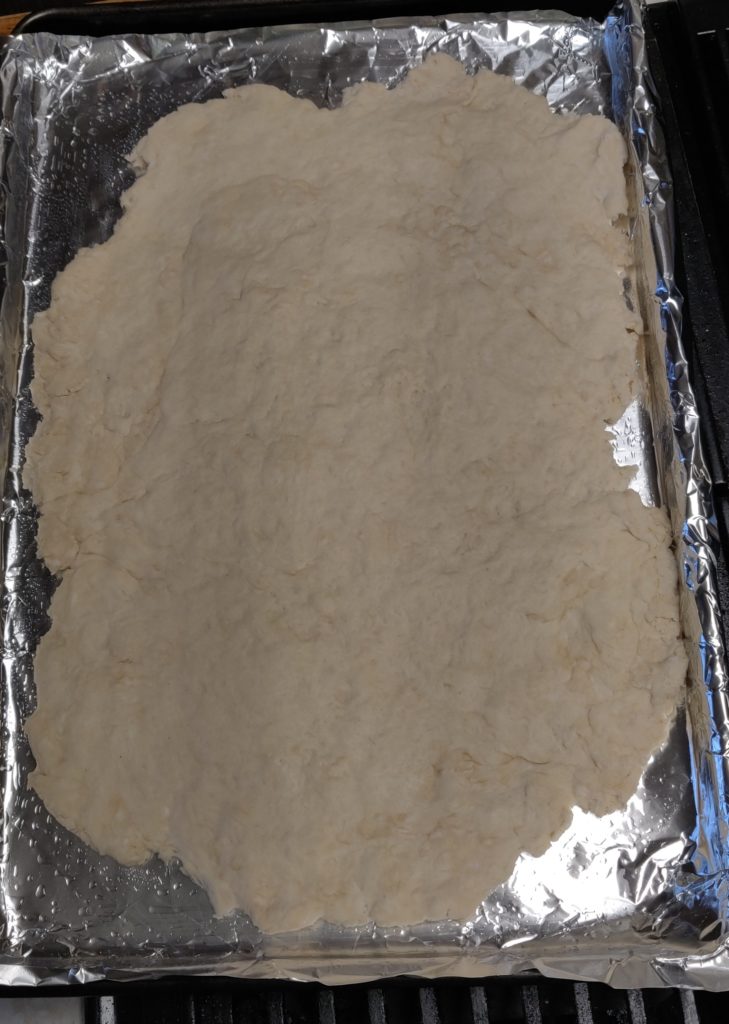
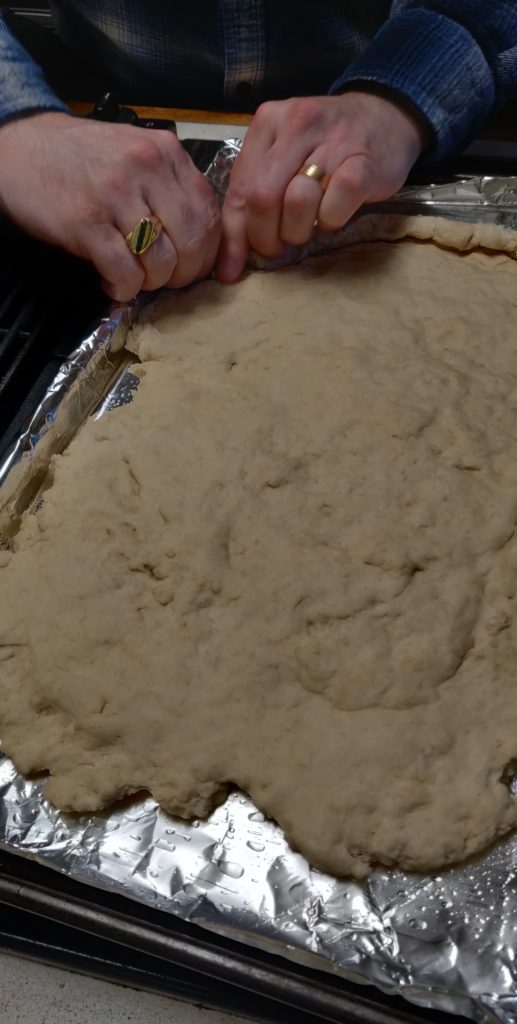
Grease the jelly-roll pan with the remaining tablespoon of oil. Without stirring or folding the dough, use a rubber spatula to scrape it from the bowl into the oiled pan. (My pans are not in the best shape, so I covered mine with aluminum foil which I covered with oil.) Oil your hands and press, pull, and pat the dough into the pan. If it resists, let it rest for 5 minutes, then continue. Let the dough rise for about 30 minutes, or until it puffs slightly, while you prepare the topping. (After I had done this, my husband wanted to roll the edges of the crust up to help hold in the sauce. I let him do that. It made him happy. It also turned out really well.)
Set the rack at the lowest and highest levels of the oven and preheat to 450 degrees.
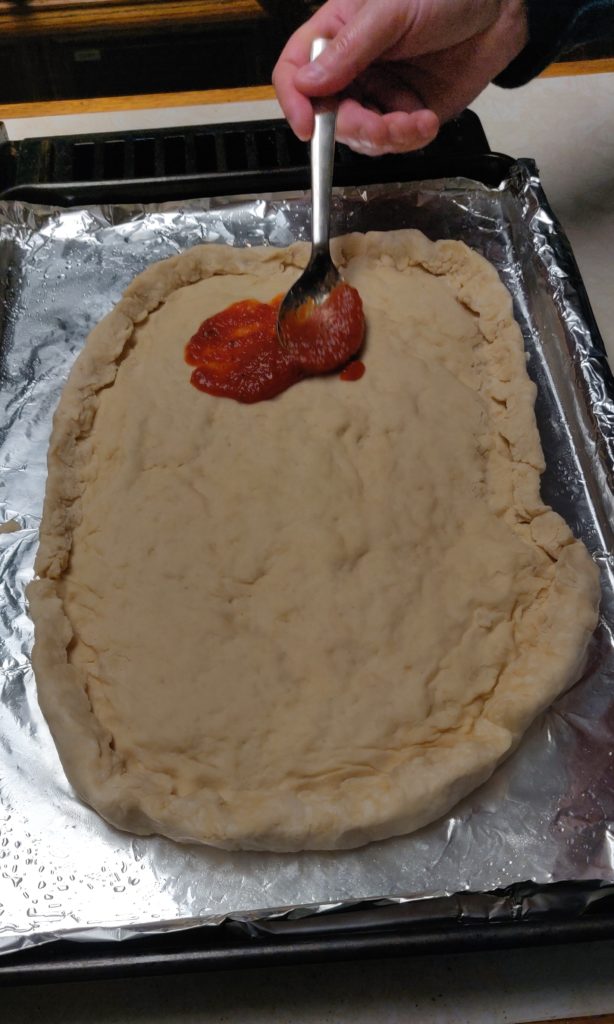

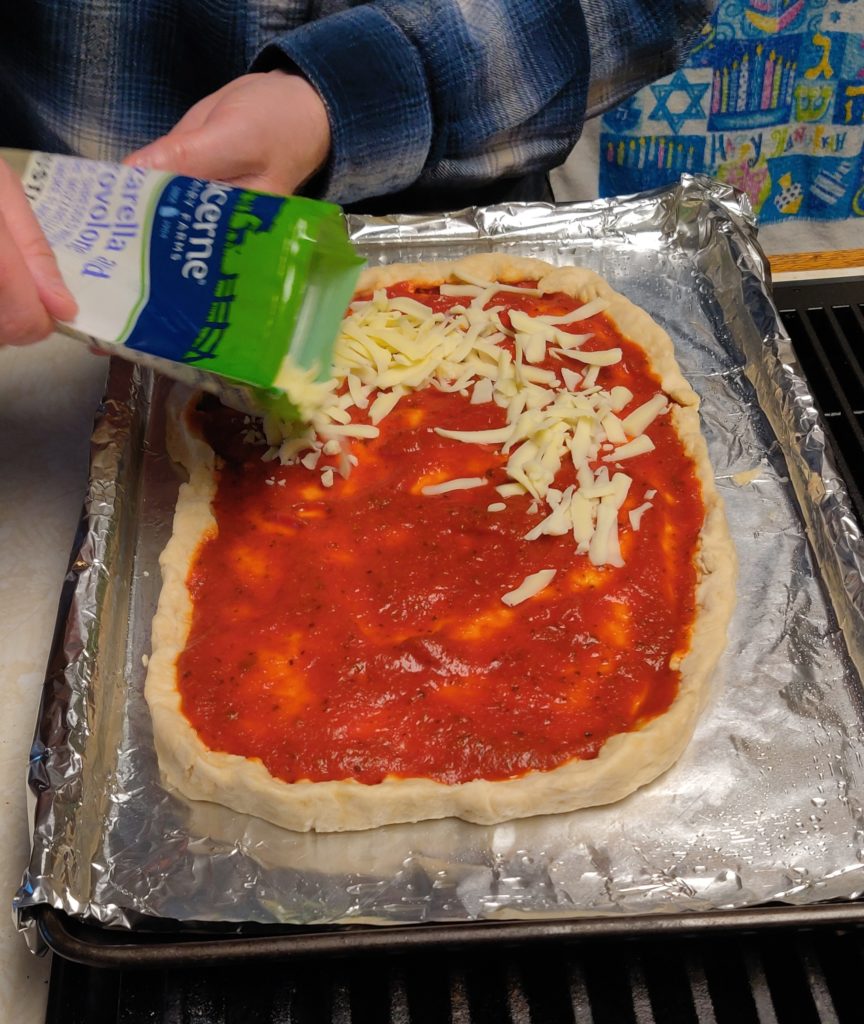
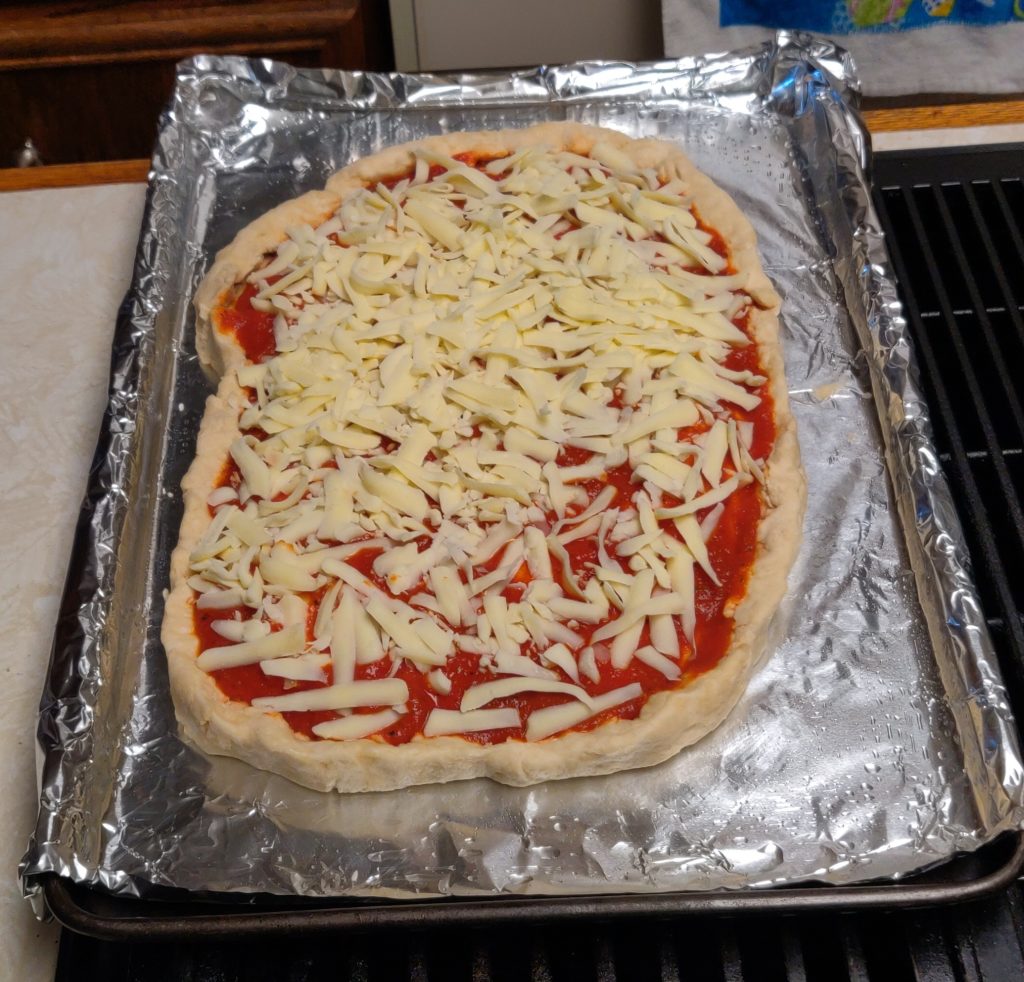
Once the sauce and cheese were added (I love going heavy on the cheese; my son does not like a lot of cheese. This pizza definitely had two “sides.”), the pizza was put into the oven. Although the original recipe said to bake for 25-30 minutes but to check the bottom at 10 minutes, we checked at approximately 9 minutes and the cheese was definitely melted and turning brown. Our oven may not be very accurate in regards to temperature. The lesson here is: keep checking your pizza so that you do not burn it!


We just made one pizza, and it was delicious! (The kids were still hungry, so they shared another frozen pizza that my husband managed to find.) I certainly plan to make more pizza crust in the future (aka after Passover). It was not a fast process, but it was an easy one. The key seems to be to plan ahead. Right now, time to plan seems to be in more of an abundance than previously, so I hope to take advantage of it.
I am looking forward to making more pizza as well as trying more of the recipes in my cookbook! I am on a roll (no pun intended)!
Addendum: If you are wondering how else I used that big bag of flour and want to drool some more, you can read about my reunion with my bread maker and garlic roaster as well as my experience with trying my hand at making sourdough bread.


9 Comments
Lauren
Omg that pizza looks amazing!! Please send to Las Vegas! Lol. Great post!
Beckie
It was! Can’t send out to Vegas, though–it was long gone way before I could possibly box it up to send. Glad you enjoyed the post! If you find yourself with some extra time during the pandemic (or any other time), you should give this a try (and let me know how it goes)!
Gary and Michelle
We love a good home-made pizza. The look of yours brought me right back to the ones my mom made.
Beckie
You should go ahead and make pizza, if not tonight, soon! It sounds as though you would enjoy it on so many levels!
Beckie
You should go ahead and make it, if not tonight, soon! It sounds as though you will enjoy it on so many levels!
เบอร์สวยมงคล
Good one! Interesting article over here. It’s pretty worth enough for me.
SMS
Very good article! We are linking to this particularly great content on our site. Keep up the great writing.
Pingback:
Pingback: