

Mosaic Birdhouse
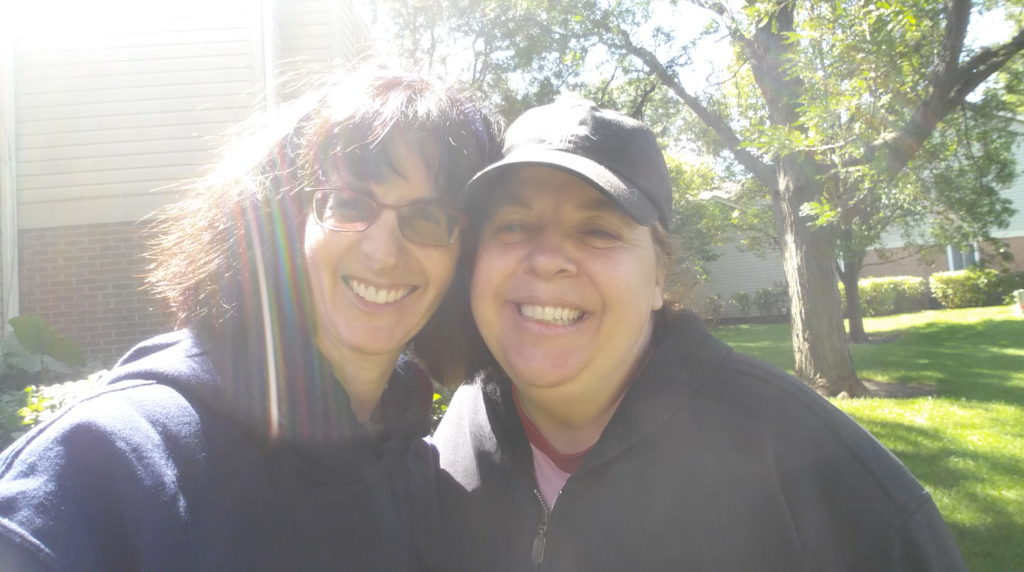
This summer, I spent several mornings with Stephanie, a woman who responded to my Facebook call for someone to teach me something new! She offered to teach me how to do a mosaic design on a birdhouse, and I took her up on her offer.
Using one of my handy craft store coupons (with my Michael’s app, I always have one on hand–stores usually accept competitor coupons, so I am always ready), I picked up a wooden birdhouse which would eventually become a masterpiece! (I set my standards high.)
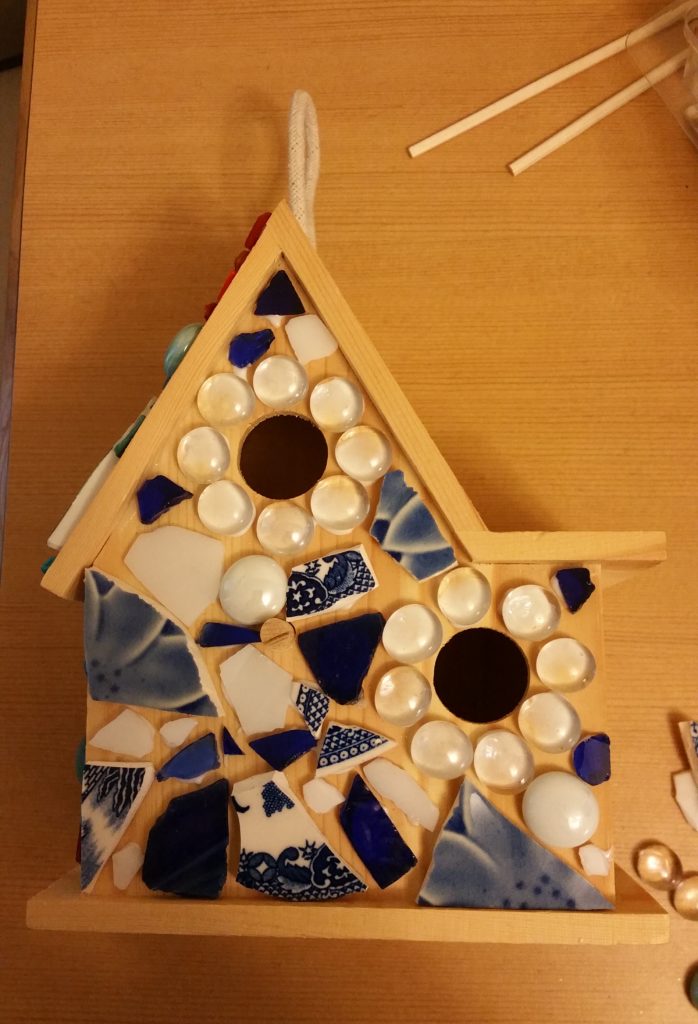
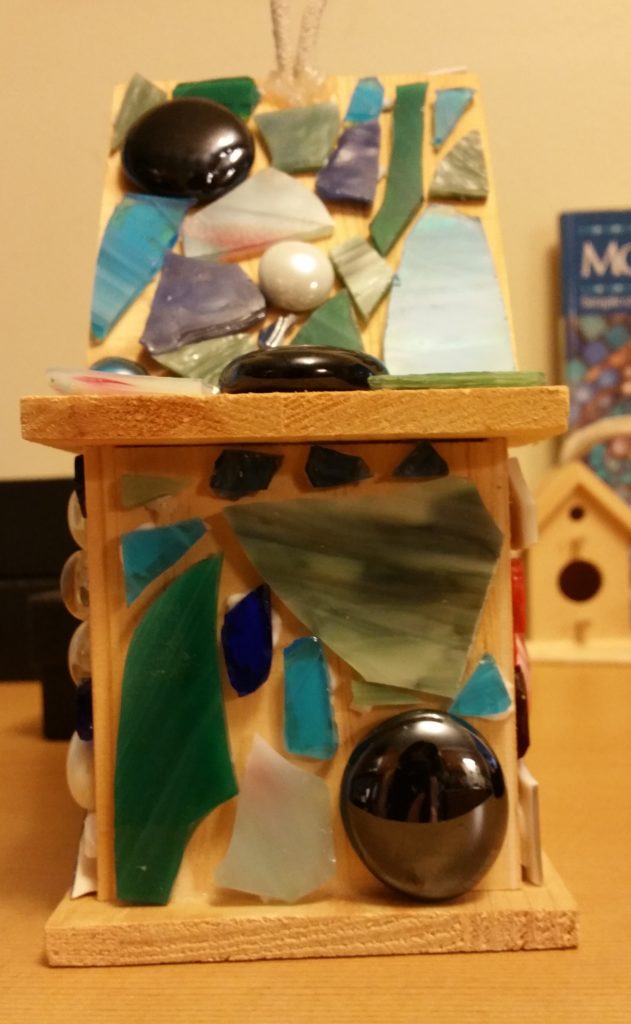
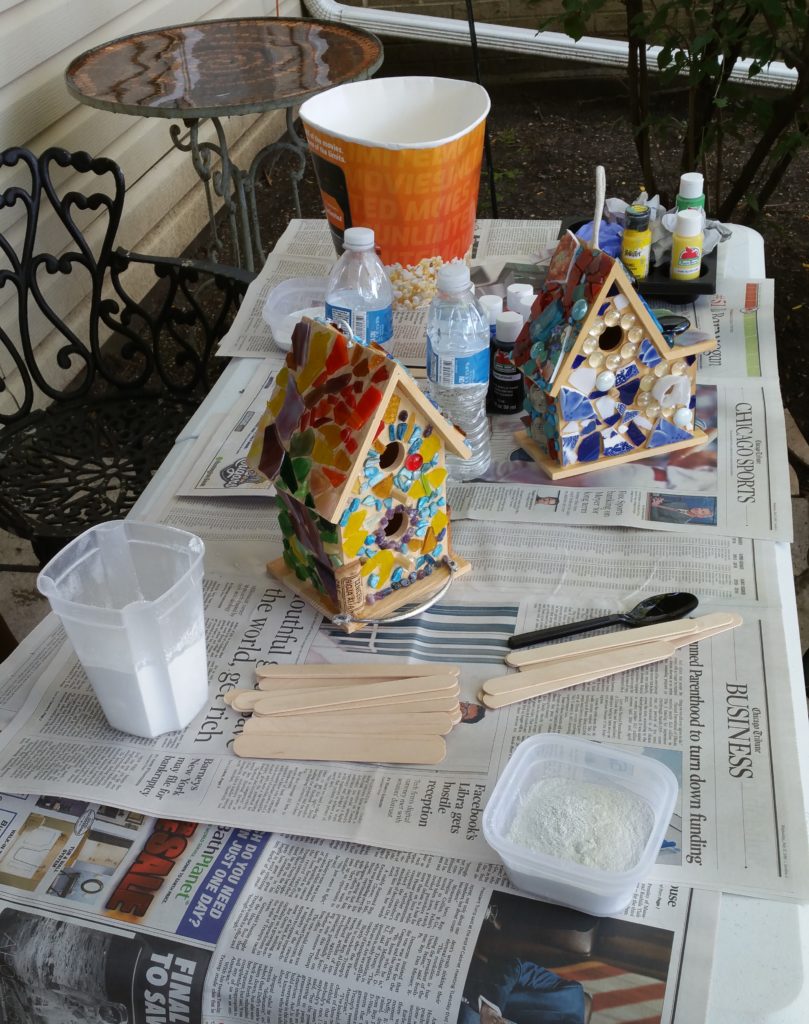
Day 1: We started the project. This project would involve getting together several times due to the various steps requiring glue or grout and drying time. Also, due to my relatively slow rate of work, I only managed to accomplish half of step one on my first day. Stephanie had multiple types of broken glass, glass stones, pieces of broken plates (this is a GREAT activity for old plates with really neat designs that you can find at garage sales or second hand stores), and more.
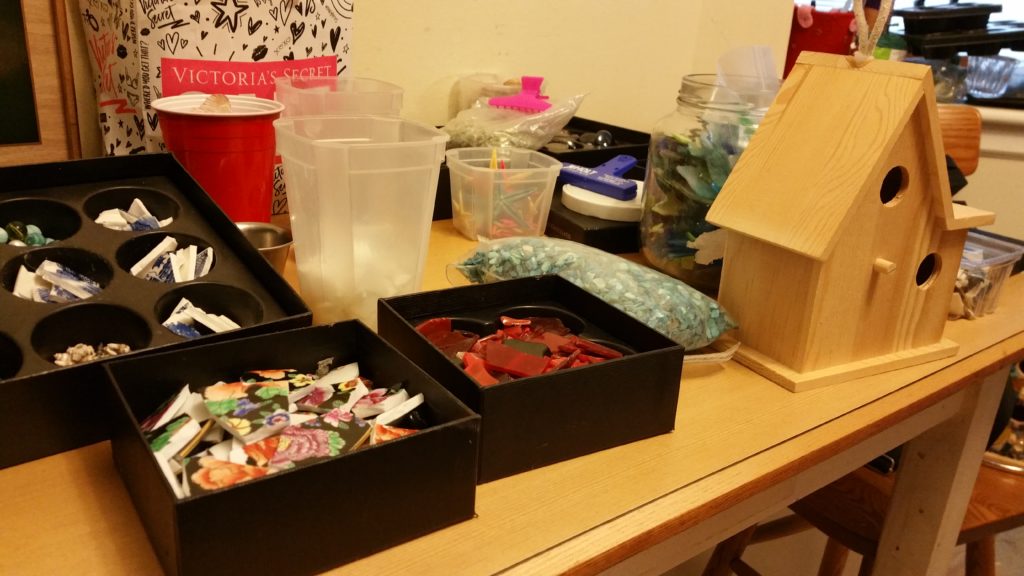
She was also able to enhance some of the clear glass beads by gluing some vellum underneath to show a new design. (You will soon enough see an example of this!) This was just like good old fashioned, classic arts and crafts! I came up with a general plan, and using tacky glue, glued on each individual piece of glass. It involved enough focus that I felt like I was truly trying to be creative, but relaxed enough that Stephanie and I had the chance to talk and learn about each other over the course of the morning.
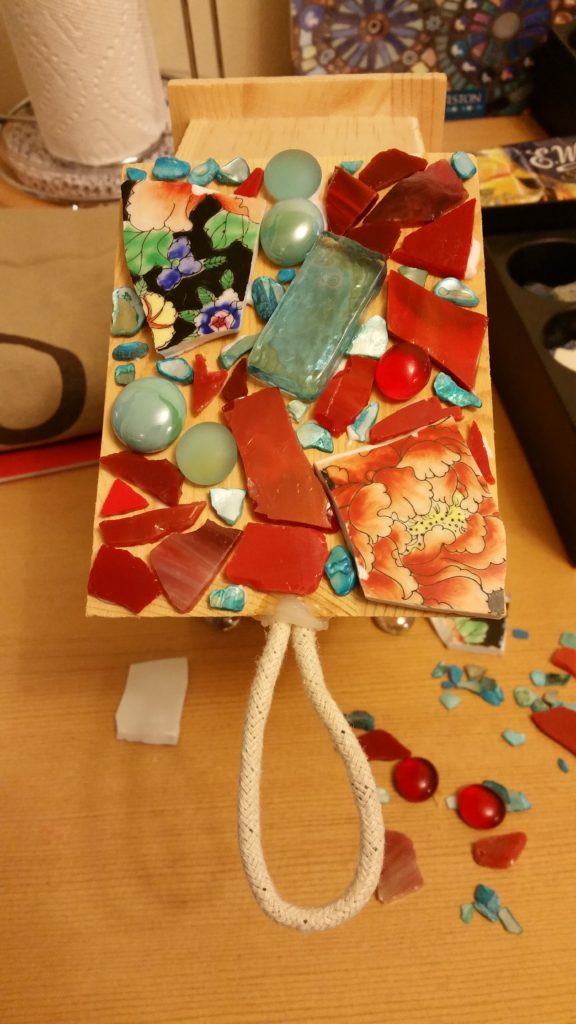
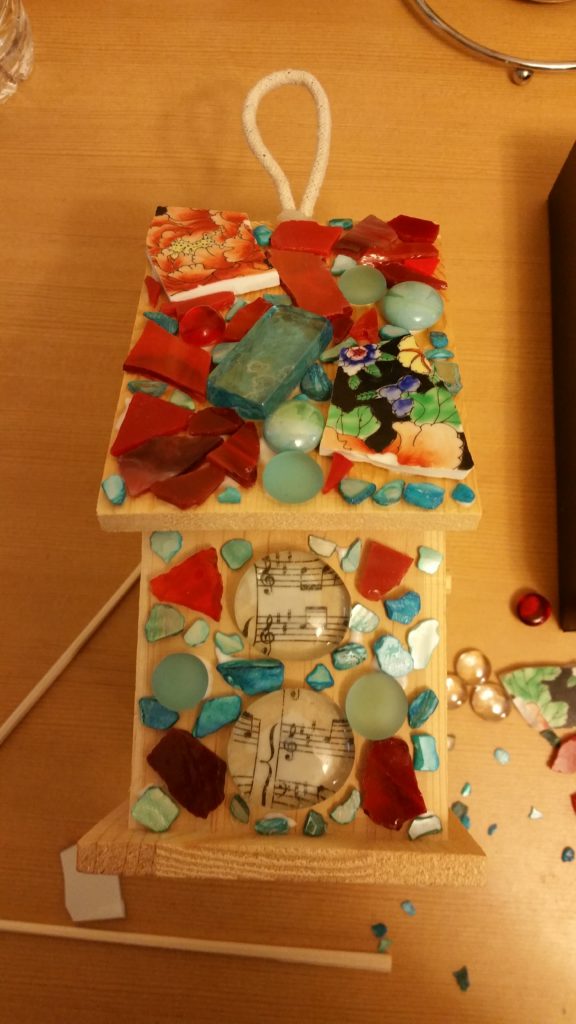
Originally I planned to stick with one type of color palate for the whole birdhouse. After doing one side, I changed my mind; I wanted something different and thus decided that each side would have its own style. (I honestly have no idea as to whether this will confuse the birds or help them orient themselves. Realistically, from the bird standpoint, it probably doesn’t matter.) By the time I had to leave on day 1, two sides of the birdhouse were decorated with mosaic pieces. We made plans to get together the following week to continue.
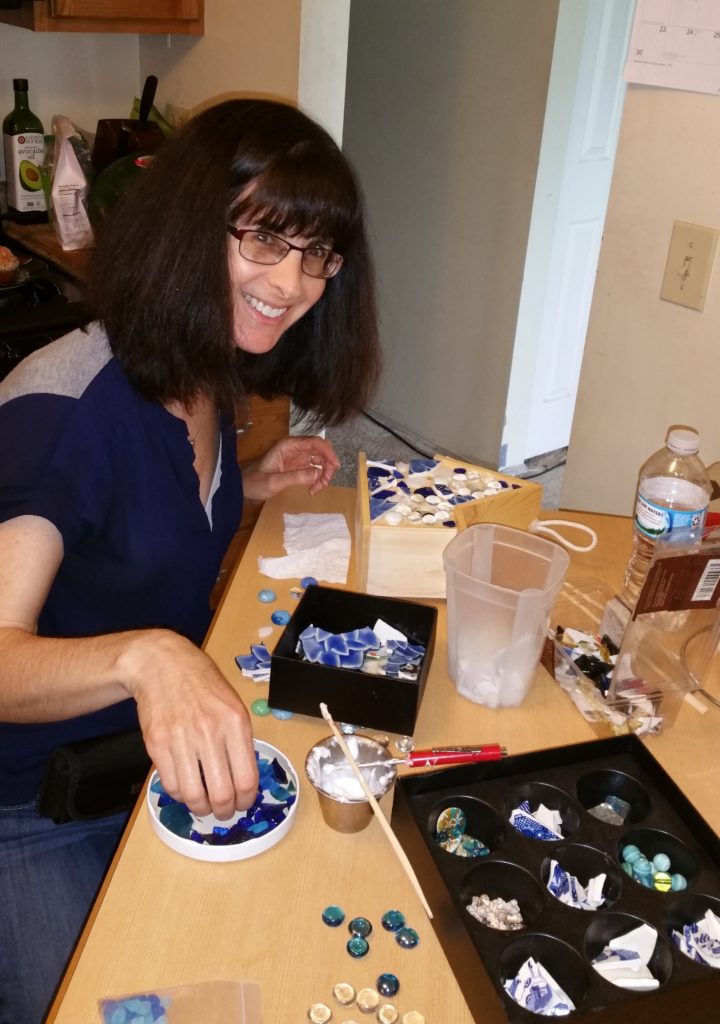
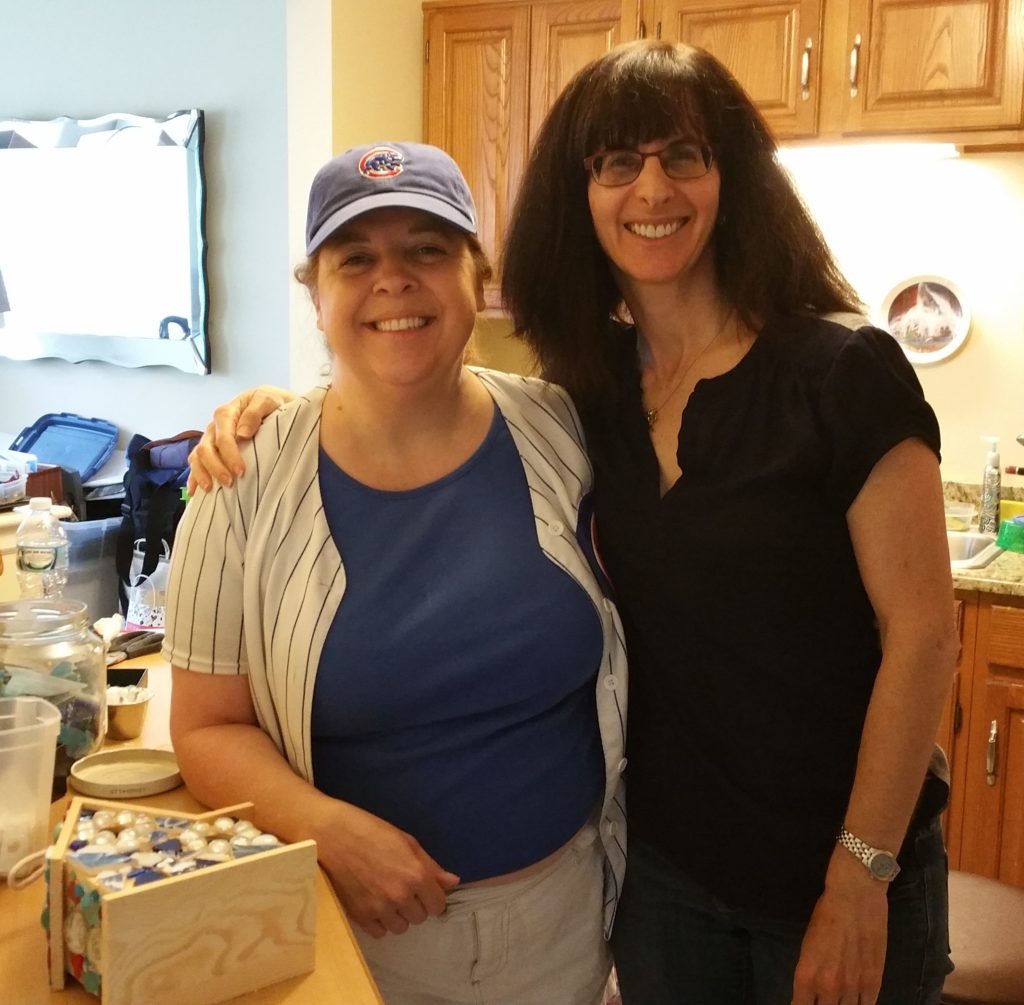
Day 2: Stephanie and I enjoyed another fun morning together. This time, I knew what I was doing. (Yea!) The focus was on color and design choices for the remaining sides of the birdhouse. The rest of the birdhouse was successfully covered in glass that morning! For me, the highlight of the morning was really getting to learn more about my fabulous instructor. She and I are close in age, so we start with a similar “baseline” of experiences. We really connected as adults, mothers, and women with hopes and goals. (Before we met, she was a bit nervous. She guessed that I may have been a college student working on a school assignment.) By the end of the morning, we set up our next get-together to finish the project.
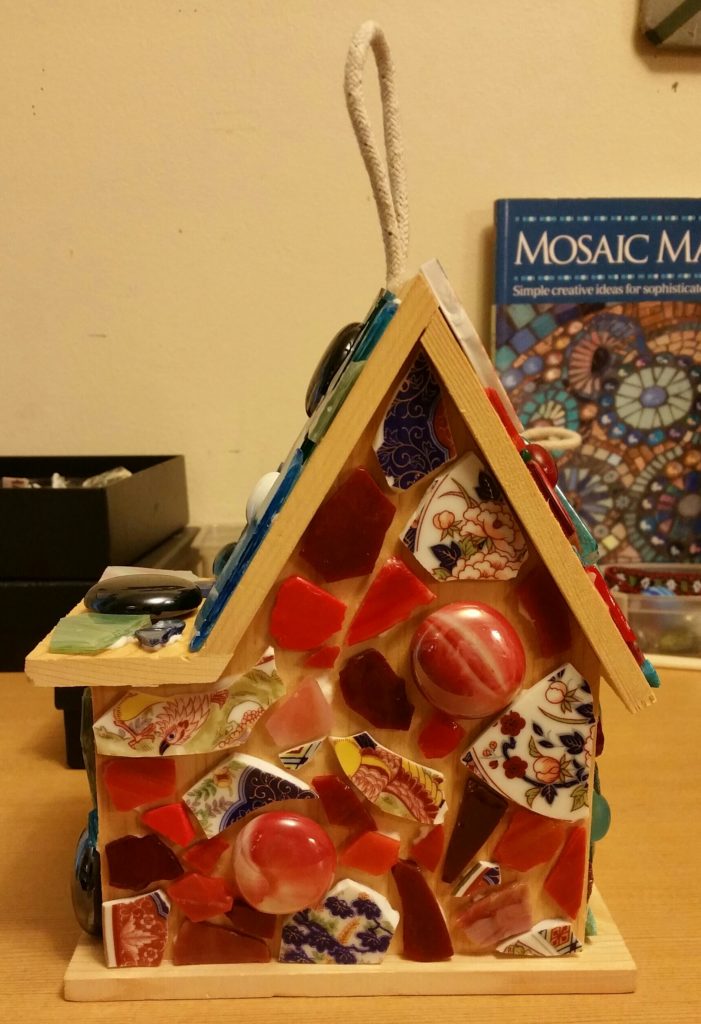
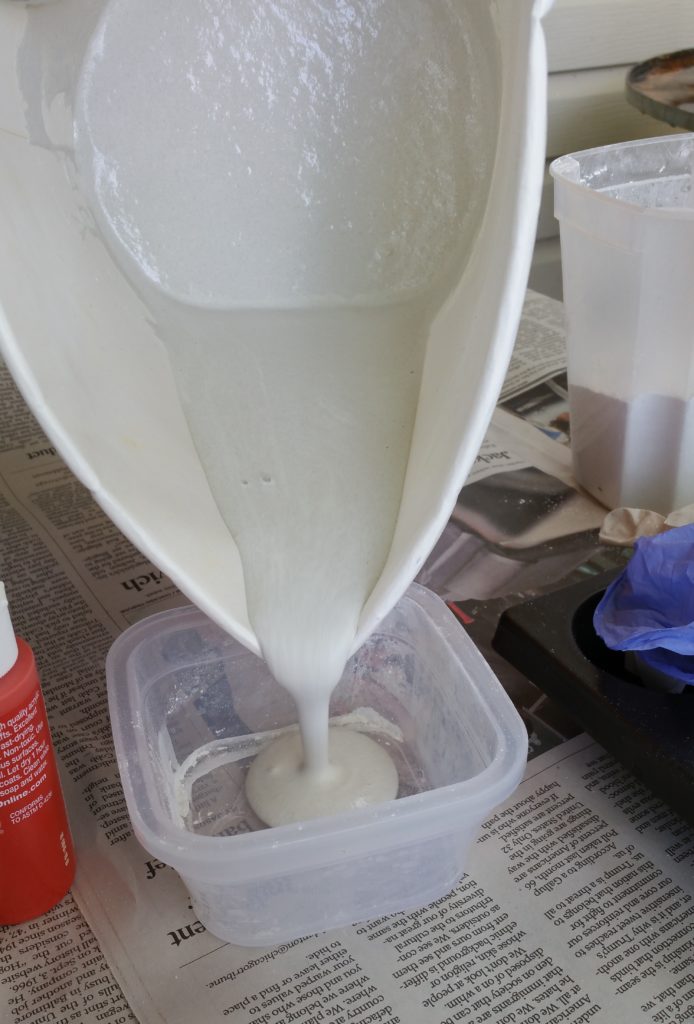
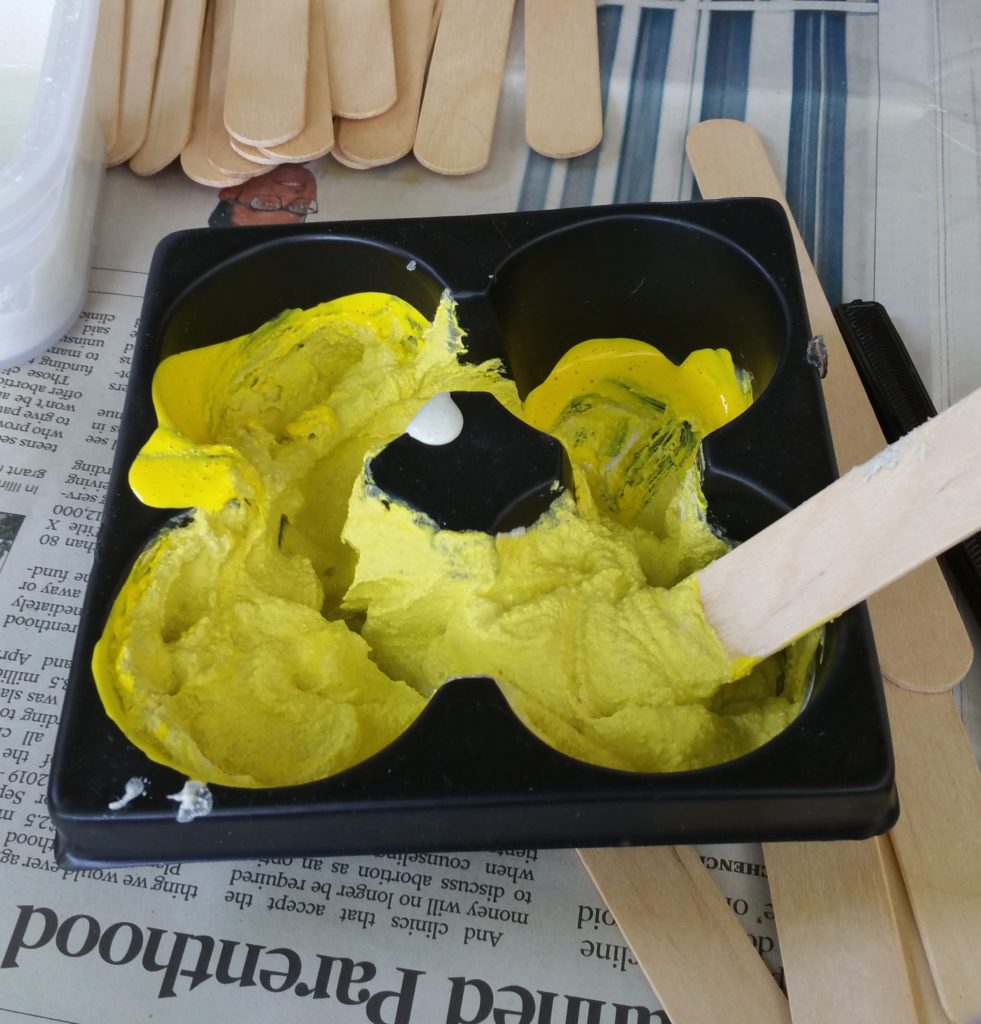
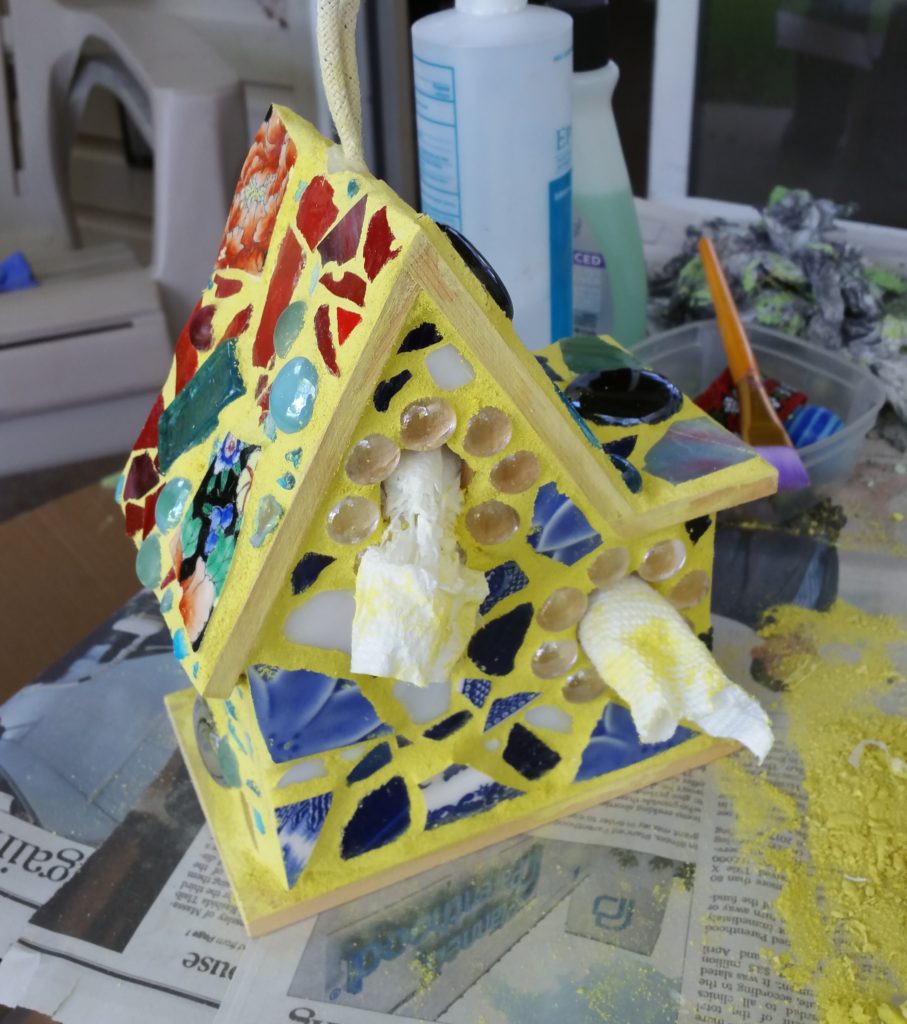
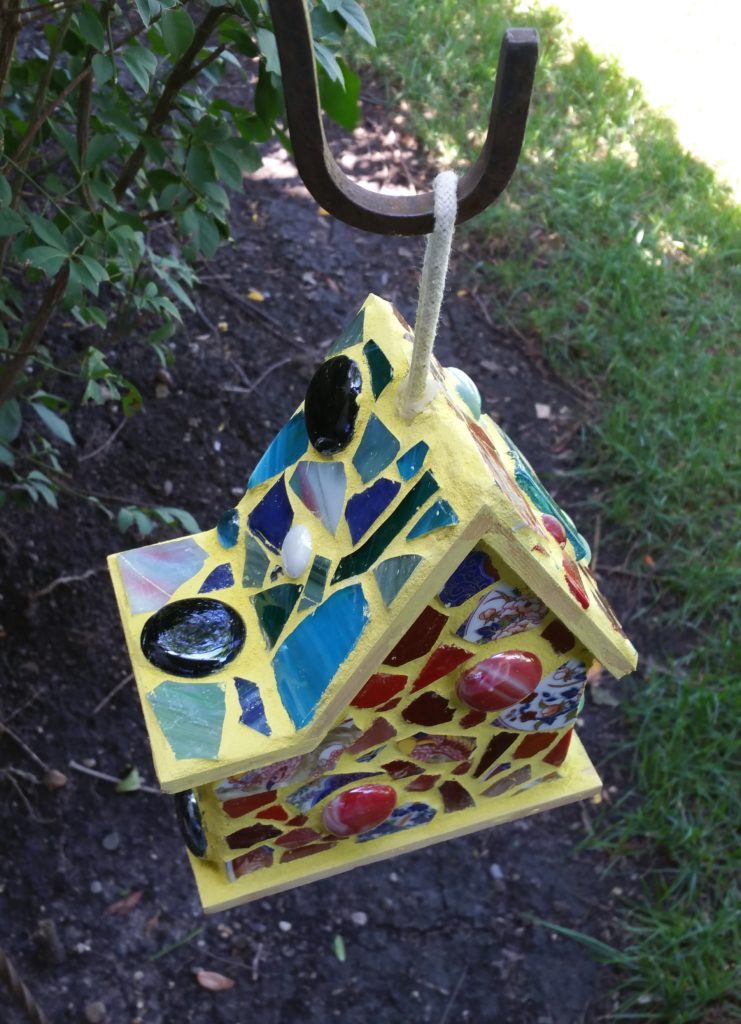
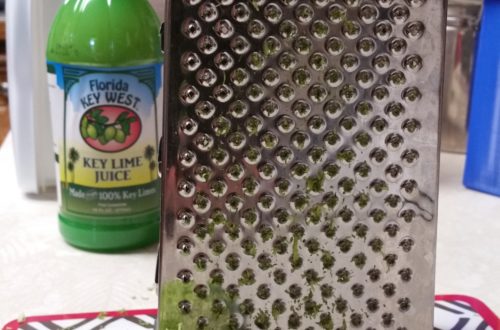
Day 3: There was longer than hoped for time gap between day 2 and 3 due to unforeseen circumstances, but we got together again for the next, new step. This was the day we would complete the mosaic birdhouse! (Cheers!). It was…GROUT DAY! Stephanie and I were going to do this together; she had a birdhouse ready for this step as well. Dressed in clothes and shoes which, if ruined, would not upset me, I started with the grout. For ease, the grout was poured into a smaller container, and paint was added to color it. For my birdhouse, I chose yellow. Stephanie (correctly) thought that it would help my colors “pop.” Then, I just had to glob it all over the sides of the birdhouse. The goal was to make sure that all surfaces were covered.
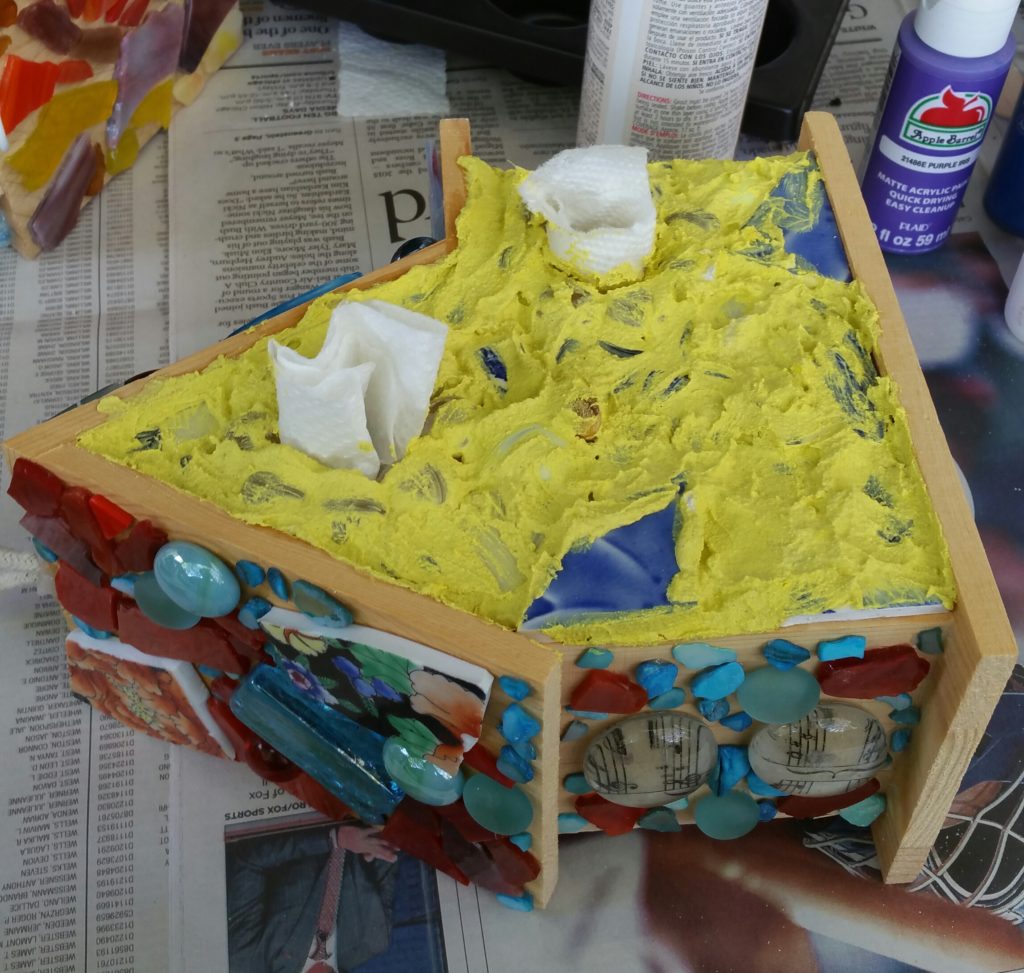
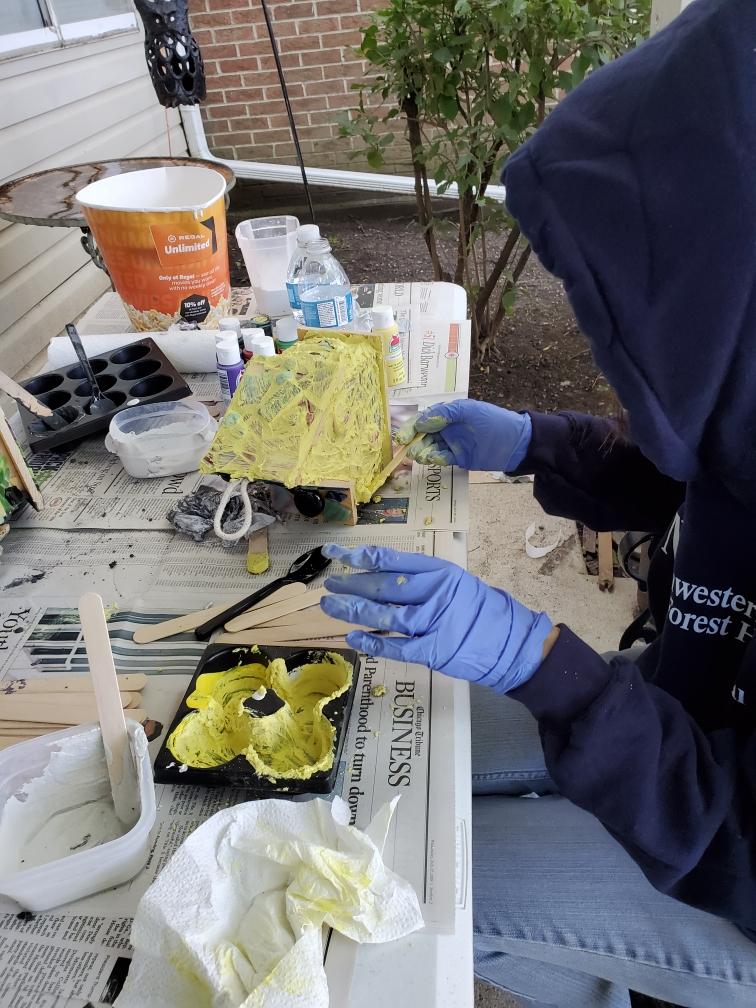
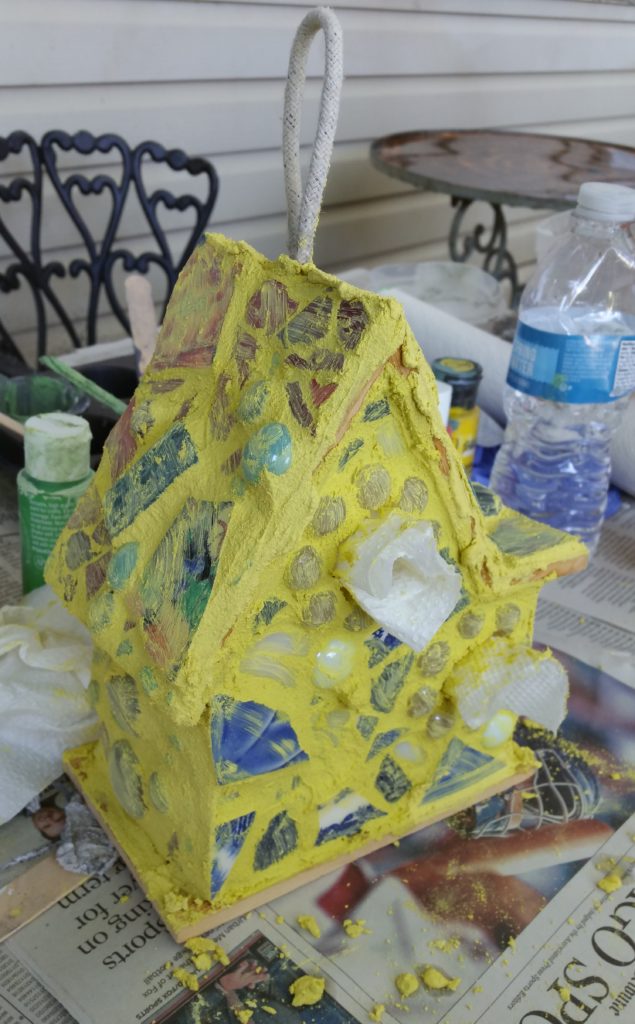
Once thoroughly covered in yellow grout, I started to wipe it away exposing the glass beads and glass pieces which were initially placed. It was almost like an archaeological excavation. The beads and glass pieces were different sizes and depths, so as I would be wiping, I would occasionally “discover” a new color starting to peek through–a small piece of colored glass! Who knows if I left buried any other decorative pieces by the time I completed the project, but I think that I was fairly thorough. The grout was smoothed down in the process, and then once down, the glass pieces were wiped a little more with window cleaner to help polish them a bit. Finally, a grout sealer was applied. This was like applying a layer of glue. It went on whitish but would dry clear. I did not clean it as consistently and thoroughly off the larger beads as I perhaps should have, but, overall, I am extremely happy with the final result!
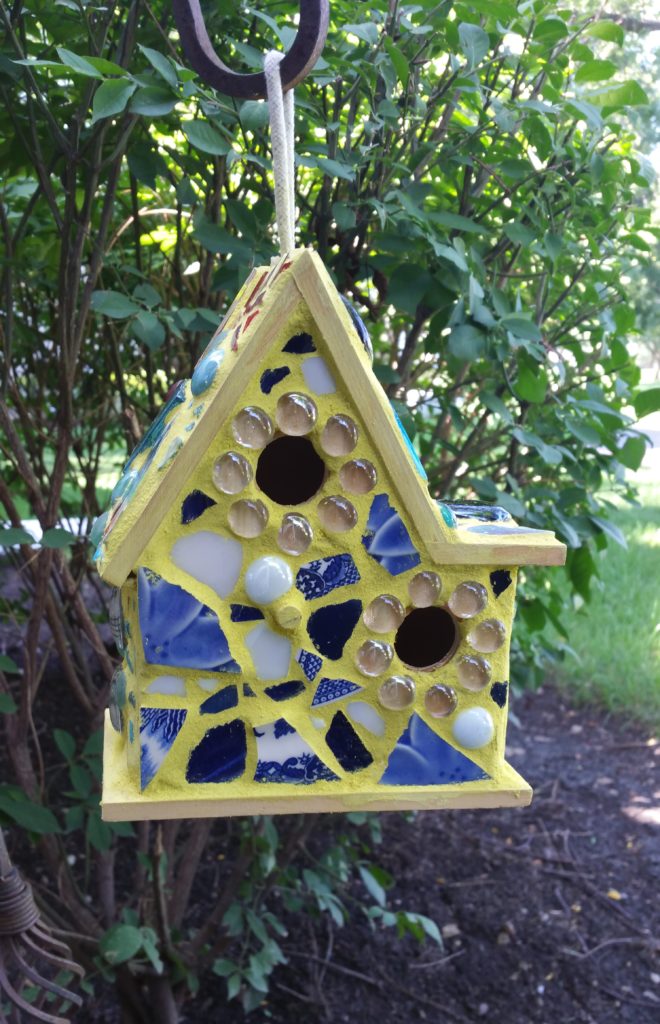
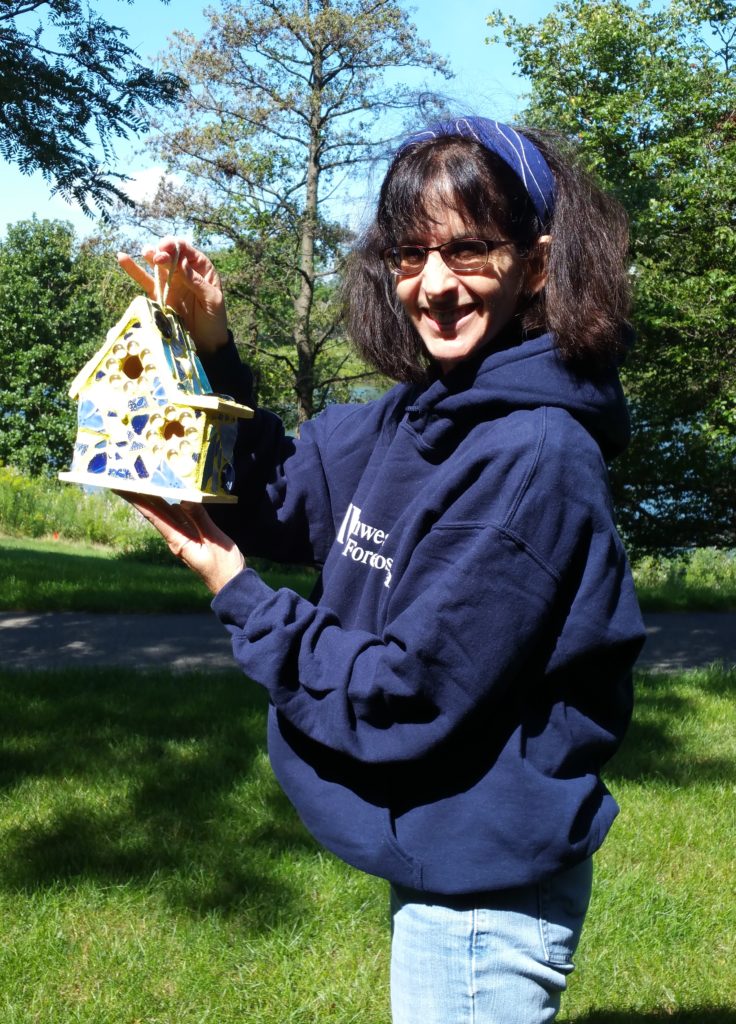
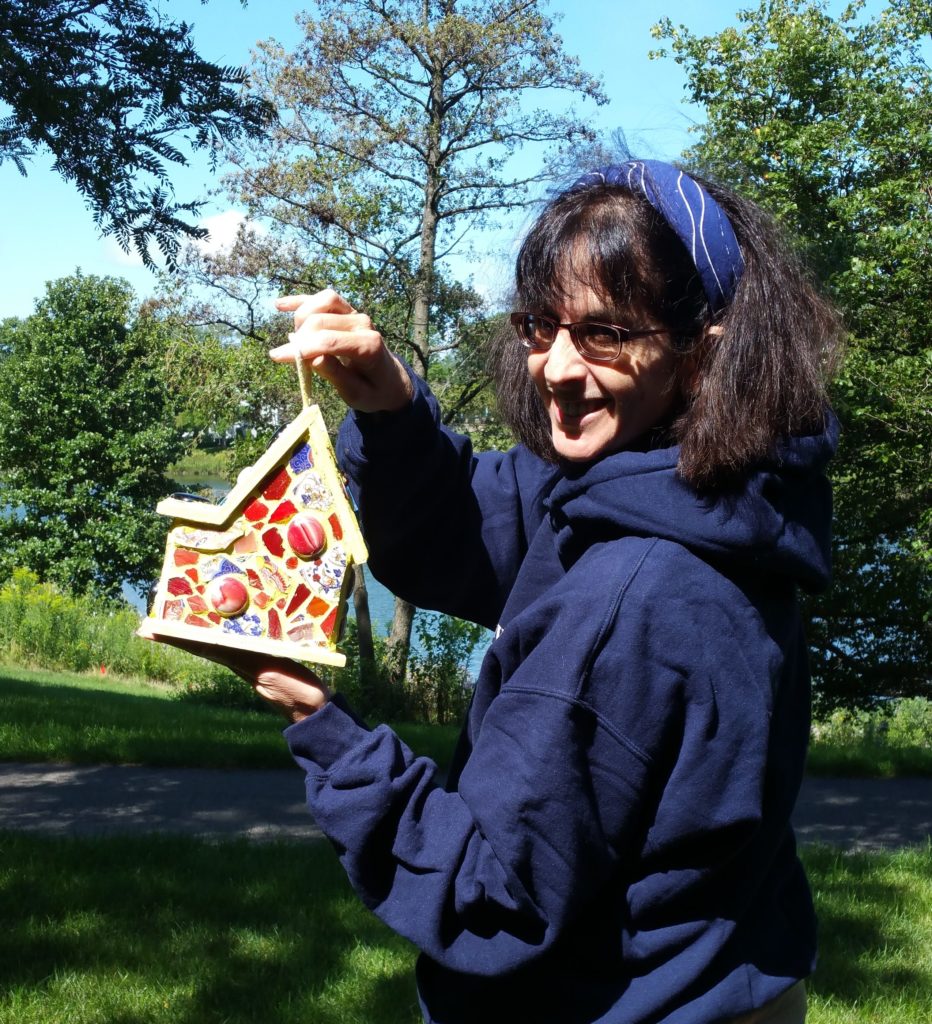
After working on this project several times over the summer, not only do I have a new mosaic birdhouse to display but also a new friend in the area. Stephanie and I are already planning our next project together! (I’ll tell you about it when the time comes. : ) )


6 Comments
Stephanie
You are so funny, love the little comments along the way…glamorous inner game show host…bwaahahaa!! I truly enjoyed our experiences together!
Beckie
Thank you! Me, too!
Danica
What a fun project! It is a joy to see all of the steps along the way.
Beckie
It was! I really enjoyed working on it!
Carol
This was a fantastic article – I loved how you broke the entire process down into steps! It really makes me want to try it myself, and I love the idea of doing it with a friend. I might wait until summer when my good friend visits and we can each do one. I really like the mosaic – it’s such a different way to make a birdhouse.
Beckie
Thank you! I loved learning how to do it and making a new friend in the process. Go for it, and let me know how it turns out! (I will wait patiently. : ) )