
Reunion with the Too-Long Ignored Bread Maker and Garlic Roaster
With extra time on my hands during the pandemic, I have been able to spend more time in the kitchen and realized it was time to revisit some wonderful kitchen “gadgets” that had not been forgotten but were so out of use that I would never think about them at times when it was appropriate to use them (I would remember them before going to sleep or in the middle of a work day when I could not do anything food prep related).
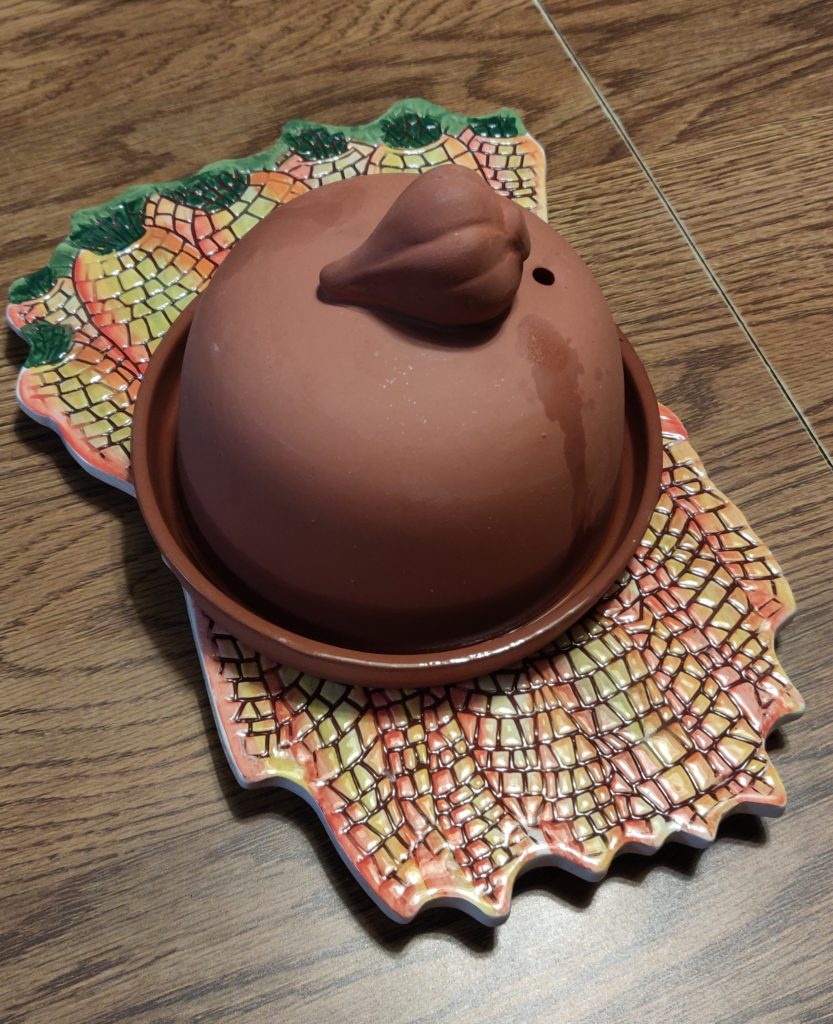
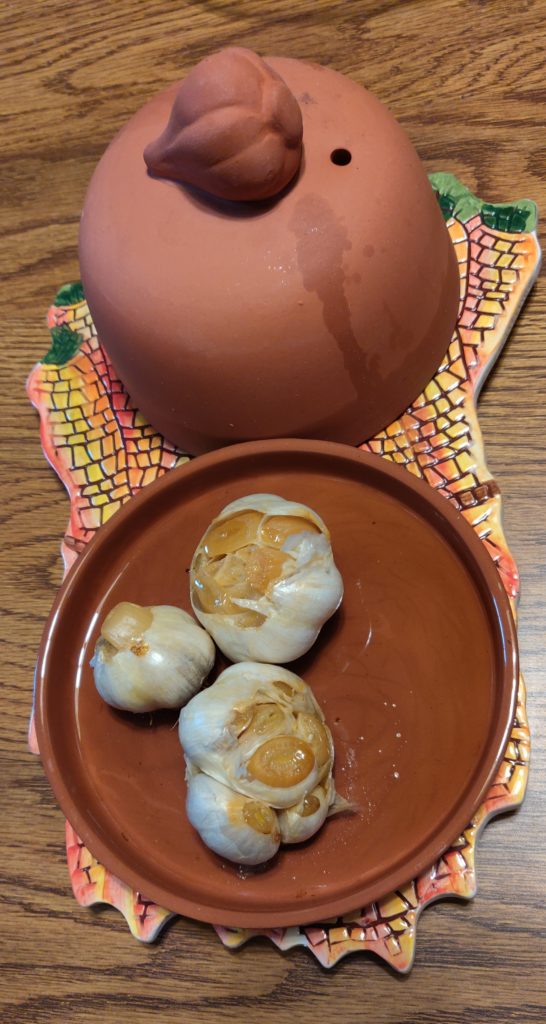
First of all, I knew that in one specific drawer in my kitchen, I had a garlic roaster. I knew it was there but simply had not taken the time recently to (re)learn how to use it. There isn’t much to it; I just forgot. Between having more time to plan meals, bulk buying at a warehouse club (I don’t have a few cloves of garlic; I have an entire bag of garlic bulbs), and the reunion with my garlic roaster, I knew that it was time to see what that lovely piece of terracotta could do.
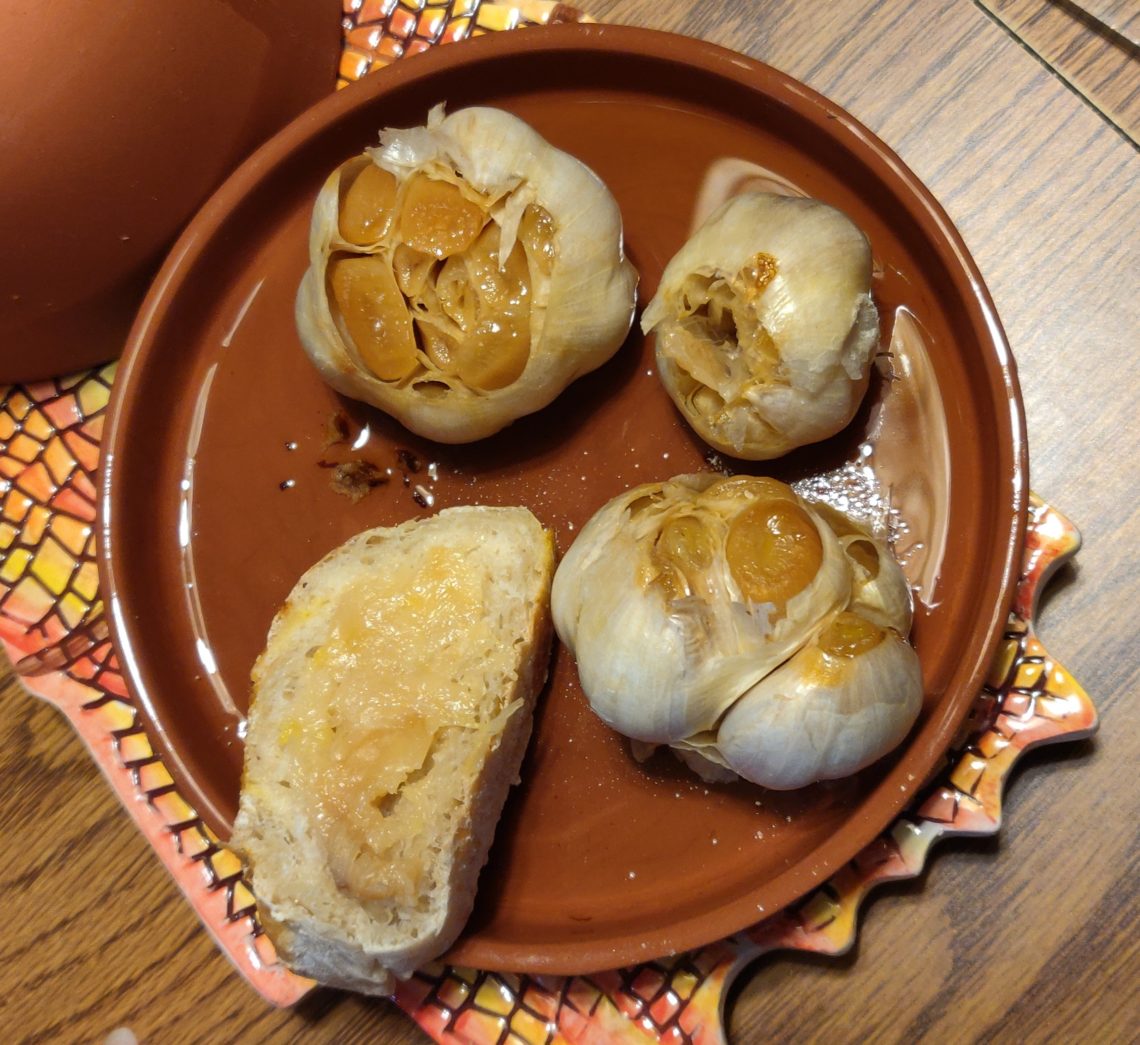
Fortunately for me, I had the little instruction sheet stored with the actual roaster, so I got right to using it (finally). The instructions were very simple (and are written here almost verbatim from the sheet): 1) Soak the terracotta dome in cold water for 15 minutes. (This step is optional, but will make the garlic more moist. The garlic bulb will roast without soaking the dome.) 2) Cut the top ½-¾ inch off the bulb of garlic exposing the clove tops. (If using Elephant Garlic, slice off about an inch or more.) 3) Remove some of the loose outer skin (but not all) leaving the bulb intact. 4) Place garlic onto a plate and pour approximately 1 tablespoon of olive oil on top of the bulb (optional). 5) Cover with the dome and starting in a cold oven, bake for 50-60 minutes at 325 to 350 degrees F. 6) Serve the roasted garlic whole. Squeeze each clove and spread soft garlic onto hot crusty french bread rounds or crispy crackers.


Roasting garlic is so easy! I decided that I probably had not used the roaster in a long time due to the amount of time required for baking.
This was delicious! We could literally squeeze the garlic (once it was cool enough to handle–learned that obvious tidbit the hard way) onto bread and spread it. I spread this on bread instead of butter, and, not only was it delicious, but I also know that garlic is good for your health. Doing something good for your health, especially if it is easy, and especially during a pandemic, can only be a positive. Plus, in case I smelled of garlic afterwards, I wasn’t going anywhere anyway. (Besides, my husband always says that you can never have too much garlic.) Once life gets a little closer to normal and schedules are tighter, I will simply have to plan in advance to roast garlic if I want to include it with dinner. It was a big hit! I am guessing that if I ask someone in my house to prepare it and get it started in the oven before I get home from work on a particular day, there should not be too much complaining. It is really that quick and easy! Plus, we roasted several bulbs at a time, so whatever we did not finish, I put into the fridge and reheated for use the next night. It was just as delicious the next day.
As a bonus, clean up was easy: The bottom glazed surface was washed easily with warm soapy water and rinsed. The dome was washed with warm water only. Easy peasy as the phrase goes.
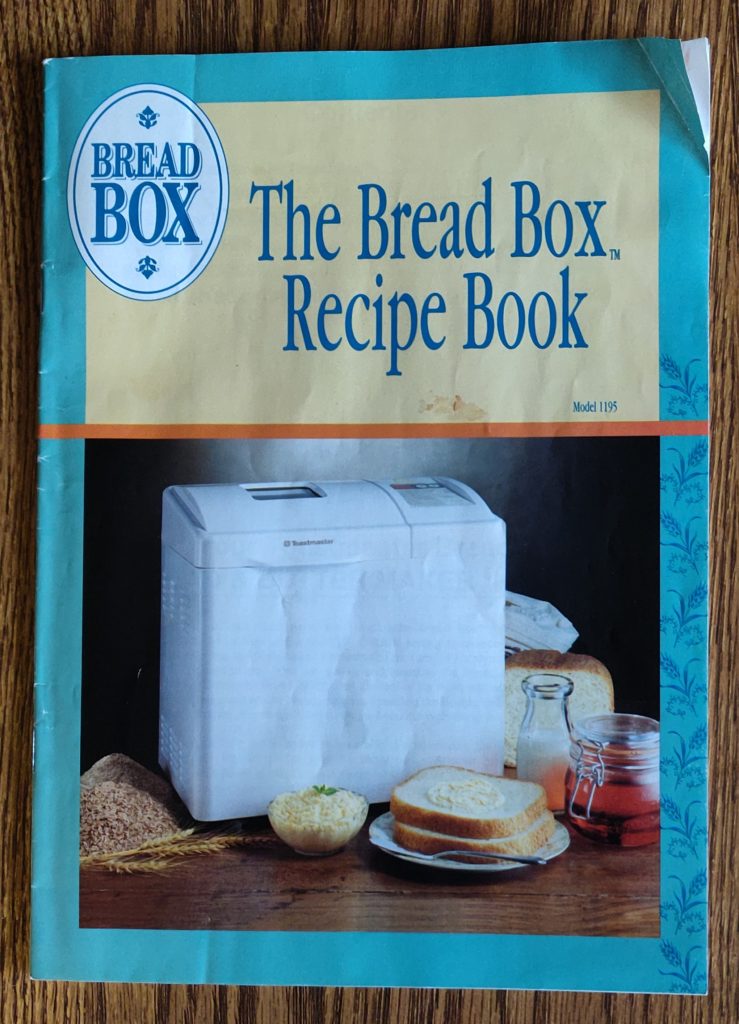
The French bread mentioned earlier brings me to device number two. I had my bread maker sitting on a shelf in my kitchen for a LONG time. I literally (as embarrassing as it is) took it off the shelf and dusted it off. At the same shopping trip where my husband bought a bag of garlic bulbs, he also bought a huge quantity of yeast and bread (because that is what you find at warehouse clubs). I had mentioned in my previous post about homemade pizza that I had a lot of time and flour. This also seemed like a great reason to put this too-long neglected bread maker to work.
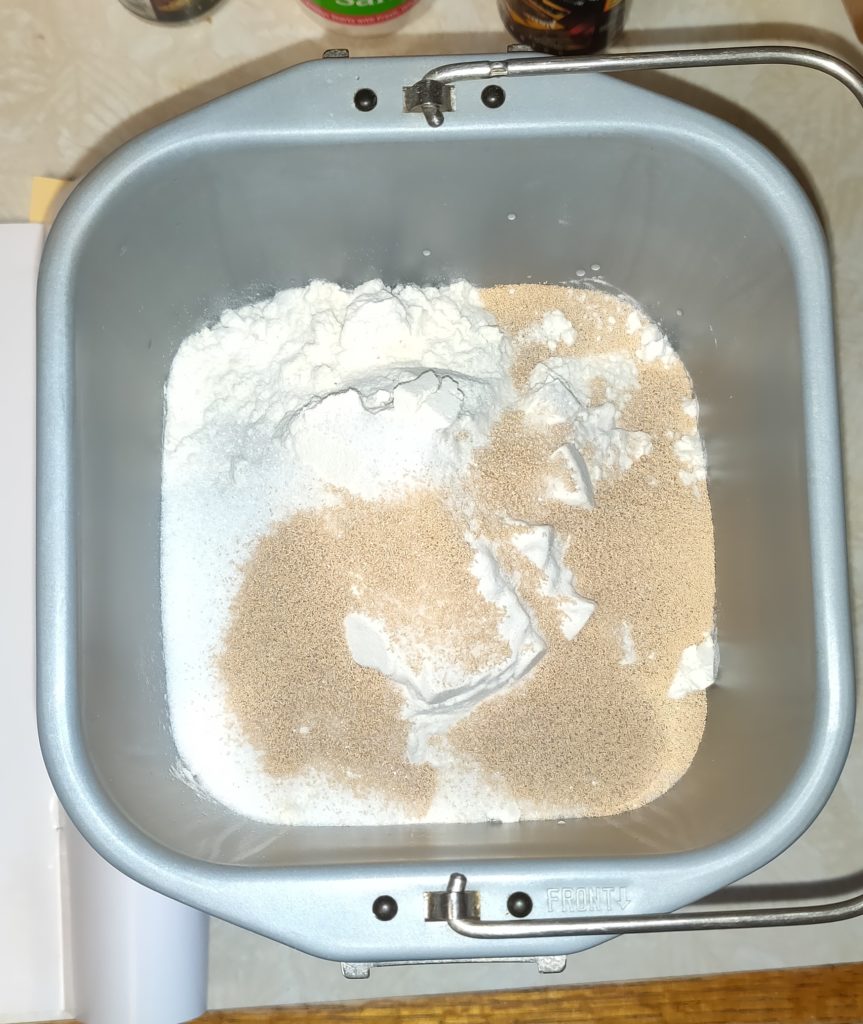
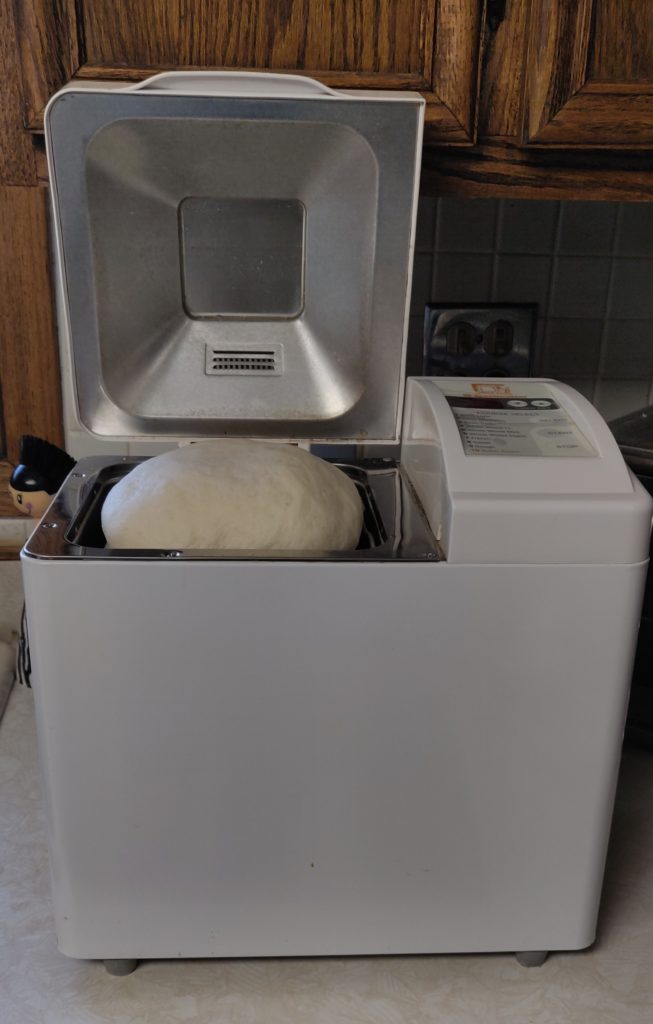
I was extremely glad that I easily found the cookbook which came with it many moons ago. (I am not sure which is older–the bread maker or my teenage children.) Because I was smart, I kept that cookbook with all of my others (good planning and foresight!). I pulled this little book off the shelf, reviewed the instructions, and chose my first recipe to reintroduce my kitchen to the smell of bread maker fresh bread! The winner: French bread. How did I make this decision? Simple–I had all of the ingredients easily available. (Many of the recipes listed dry milk which I did not have at home.) I also decided it would be really hard to screw up a basic French bread recipe in a bread maker. As long as I could measure and read, I was golden. This worked out perfectly! Making bread gets added to the list of things to do more often–it just involves planning in advance. This bread maker also has a setting to make dough. Since the French bread success, my husband and I have also used the machine to make dough for challah and for French baguettes. This took more time and effort simply because we had to do something with the dough. With the first French bread recipe, I just had to put the ingredients in the bread pan, place it in the machine, choose a setting, and press start. With the dough recipes, we made just that–dough. It still needed to be shaped, allowed to rise more, and bake. It was still easy; it just required paying attention to the time and doing a little more hands-on work.


My family has been informed that we are not buying a premade loaf of bread again for a long time. (Remember, I have a lot of flour and yeast.) I am really enjoying my family getting spoiled with fresh bread.
Once life starts to return to normal, I am hoping that we can remember how delicious and easy it is to prepare roasted garlic and fresh bread. Neither took much effort, but I truly feel that they made our family dinners that much more special. They just involved a little planning. I am confident that we can do that!

I suppose that now is a good time to see what other kitchen gadgets I have but haven’t used in a long time (but knew that I still wanted to use thus why I haven’t gotten rid of them). I know that I have a device to make a “blooming onion” in a cupboard. Time to try it out! (I’ll let you know how it goes!)


6 Comments
Rachel
These both look scrumptious. Please invite me over when social distancing is behind us to eat these things!!!
Beckie
I will!
เบอร์สวย
I am regular visitor, how are you everybody? This article posted at this web site is in fact pleasant.
SMS
bookmarked!!, I like your blog!
Pingback:
Pingback: